How to Paint Skullvane Manse - Buildings 1
If you have any questions / comments, please feel free to post on the forum thread for this tutorial.
Painting biiiiiiiiiig Buildings (nearly) Start to Finish/Skullvane Manse
So this is a big one (in more ways than one)! Firstly my camera ran out of battery about 2/3 of the way and given that I was trying to assemble and paint this gargantuan piece in one day I didn't have time to wait for it to charge, I'll do my very best to fill in the picture-related gaps with adequate text though.
Here's a picture of the box to let you know what we're dealing with in terms of size: kitten included for scale...

And Inside:


Required tools (didn't use the liquid GS in the end):

Specialist tools: My favourite drybrush (yes it's a makeup brush, seriously it's the best I've ever used, lasts longer than most normal drybrushes as well, this has had hard use for 1 year)

Primed Halfords Grey, Undercoated Chaos Black.

Basecoat (not on roofing if possible): Just a dot of chaos black in there, prob not needed in retrospect.

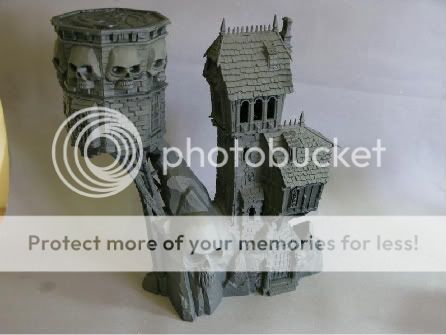 Roof
1-2
 I prehighlight the roofing tiles with fortress grey, then skull white, heavy drybrushing will do if you don't have a spray can/airbrush or just can't be bothered to mask off the brickwork).
 3-6
3-6 My favourite colour comes into play, I went blue+turquoise, Turquoise alone, Turquoise +Skull white, thinned with a bit of medium.

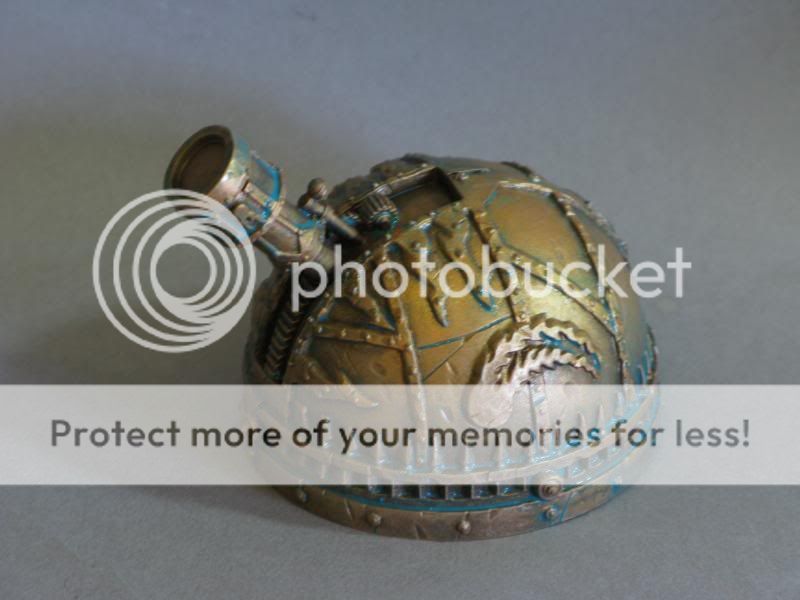
 Observatory
1
 Undercoated: Scorched Brown
 2
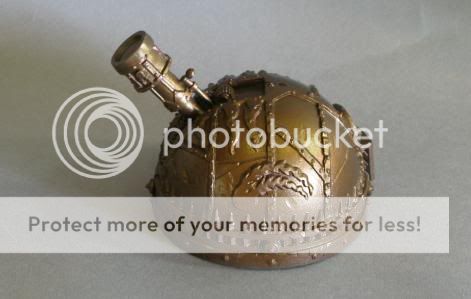
2 Basecoated: Shining Gold+Dwarf Bronze
 3
3 Highlighted Shining Gold (drybrush)
 4
4 Mix up dark angels green + hawk turquoise +water, really thin! This will make our verdigris.
 5
5 Splodge it all over, leave it aside to dry:
 Brickwork
1
 Heavy Drybrush of codex grey, all over, be patient, on a model of this size this is literally an hours work or so, a good first layer is irreplaceable.
 2 (camera started dying here)
Slightly lighter drybrushing of Codex+ Fortress Grey, still don't be stingy, we're going to be finishing up fairly bright, this isn't a 'light' coating of paint, just not a 'heavy' drybrush.
3 Plain fortress grey, slightly less on the brush for drybrushing now.
 4
4 Finally we're onto what I'd consider to be 'light' drybrushing, still ensure you don't miss any spots, Fortress Grey + Skull White
5 Final Drybrush Highlight: Pure skull white, barely any on the brush, if yours is as thick as mine you'll need to add a *tiny* amount of water, then wipe off all but the dregs elsewhere, my tester is to brush it on the back of my nail, if it's only picking out the very slight ridges you're on track!
I also used this to highlight the roofing tiles, picking out their edges and ridges.:
 Camera is Dead at this point, again my apologies
Wood
1
 Calthan Brown + scorched brown, all over
2 Sepia + Devlan mud wash all over
3 Bestial + Scorched drybrush
4 Pure Bestial Drybrush
5 Very Light Bestial + Snakebite Drybrush
Golden bits
1 Undercoat with calthan brown+Scorched brown
2 Vallejo Model Colour gold, this thing works wonders, thin it with thinners or alcohol though, do not involve water at any stage, one or two coats should do it, I don't shake the paint but 'swill' it genty around in the pot, this avoids bubbles.
3 Same Verdigris mix as used on observatory
Silver Bits
1 Undercoat Black
2 Base boltgun
3 Wash Devlan
4 Drybrush Boltgun + Chainmail
Skulls! (oh the skulls...)
1 Base Dheneb Stone (2 coats)
2 Wash Devlan Mud
3 Highlight heavy drybrushing of dheneb +bleached (be careful not to get brickwork)
Finally I weathered the parts of the model where I thought dirt/grime would settle with a light drybrush of knarlock green + graveyard earth + scorched brown
Done, Pics:
 Link to one million pictures of the finished Manse
Apologies for the picture issues on this one guys, if I've missed anything out don't hesitate to ask as ever.
What our customers are saying...
Sign up for our newsletter - for the latest news and promotions
Element Games Team
Stockport Store and Gaming Centre
