1 Day Daemons: How to Paint Daemonettes - (speed painting)
If you have any questions / comments, please feel free to post on the forum thread for this tutorial.
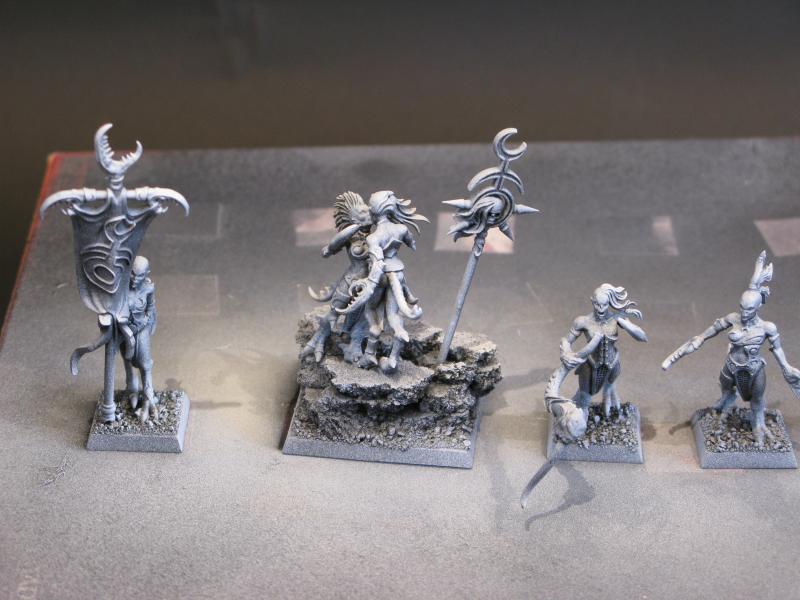
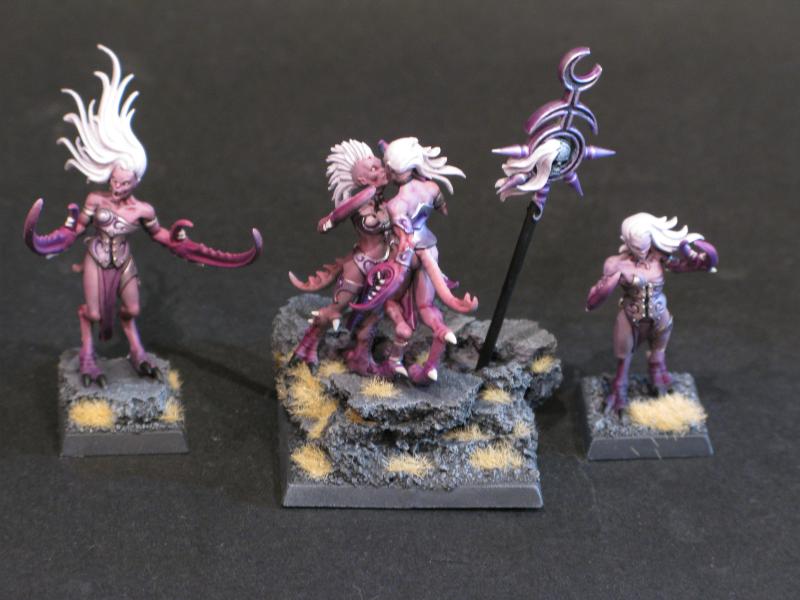
Hello again all, having just finished a large unit of daemonettes as a bit of an experiment I thought I'd write up a tutorial to let you know how I went about it, there'll be some more daemon articles coming soon, as I'm going to do a full army.
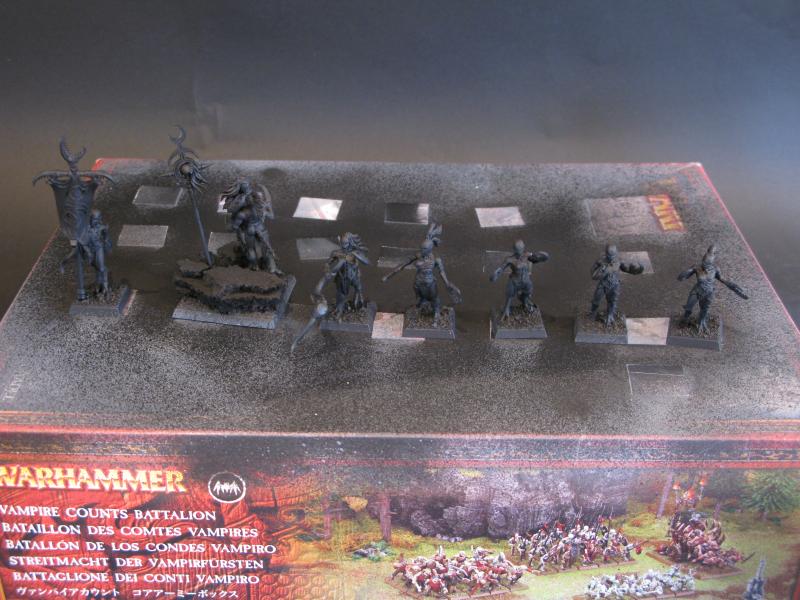
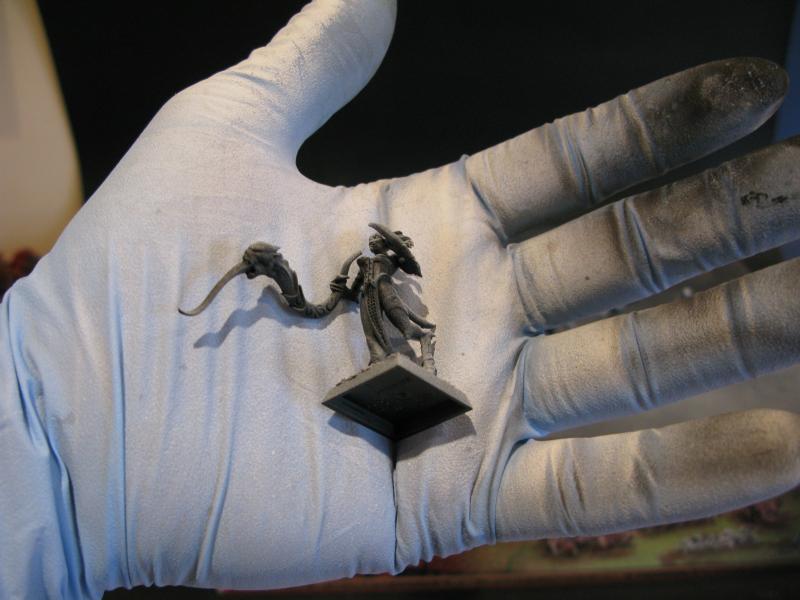
Firstly the models took me about 9-10hours to paint, from start to finish, I had already assembled them (slowly...seal lines, eurgh

). So roughly the time per model is about 30mins. The painting of these guys was about 70%airbrush+wash work, with some detailing on the armour, metallics in general, and finally the bases.
This daemon army is an experiment seeing how far I can push the quality of my work, whilst doing (by my standards at least) it all in a fairly short time frame, the final result is a high tabletop standard unit, but it's probably not enough to win any awards. However one step of highlights and a little bit of work on weathering or something could result in an extremely high standard, I set myself the restriction of painting the minis in a day, so the following step by step is as far as I got.
Generic Equipment Needed for this Tutorial:
Black Spray
White (or bright spray)
Primer - I use halfords grey
Vallejo Glaze Medium
Airbrush
The paints are down to you, I'll list the ones I used but it could be done with whatever scheme you wish.
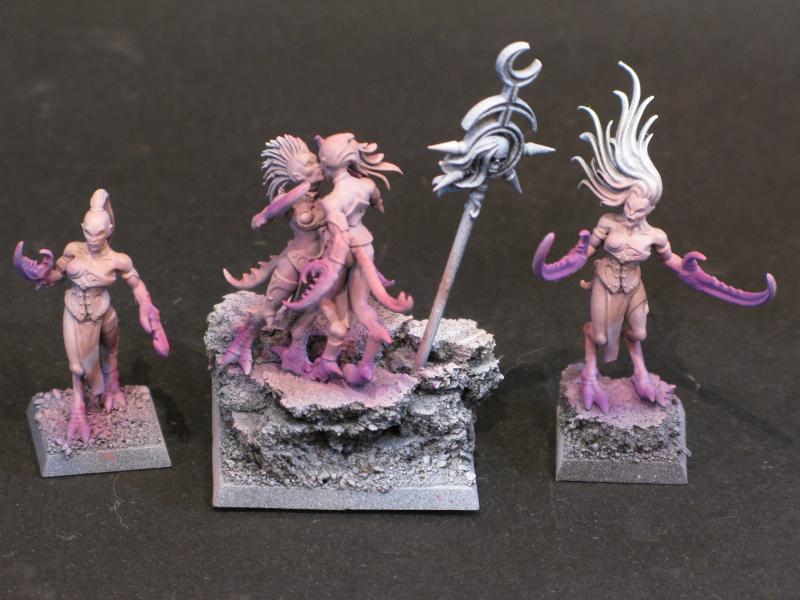
Step 1: Halfords Grey Primer, all over: these stuff gives your minis a little more durability, and paint sticks to it really well! Once this is dry chaos black, ensuring to get every angle, this is necessary for the pre-highlighting we're about to do in step 2.
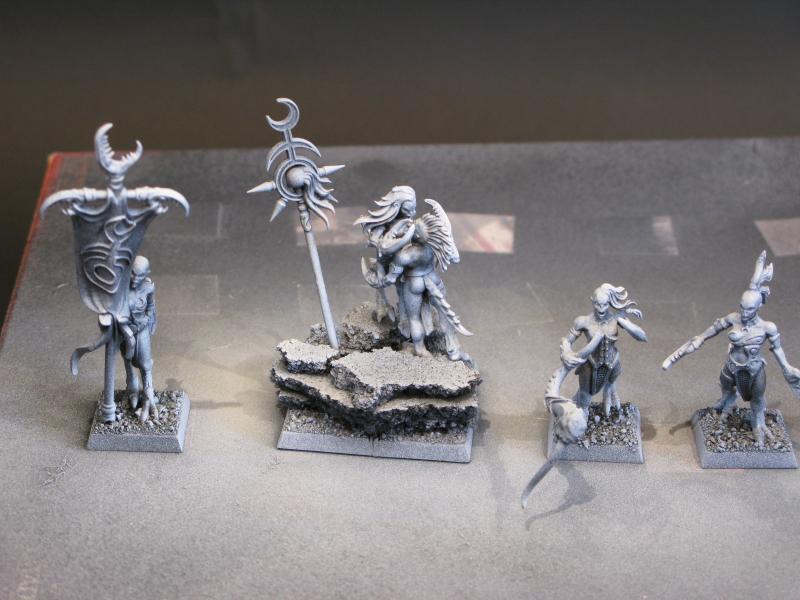
Step 2: From a 45 degree angle, and then from on top spray your minis with white, or any other bright spray (you can re-use the halfords grey), this will 'pre highlight', there's a few shots here, including one from below, your mini should look almost 100%white when viewed from the very top, and all but pitch black when viewed from below.
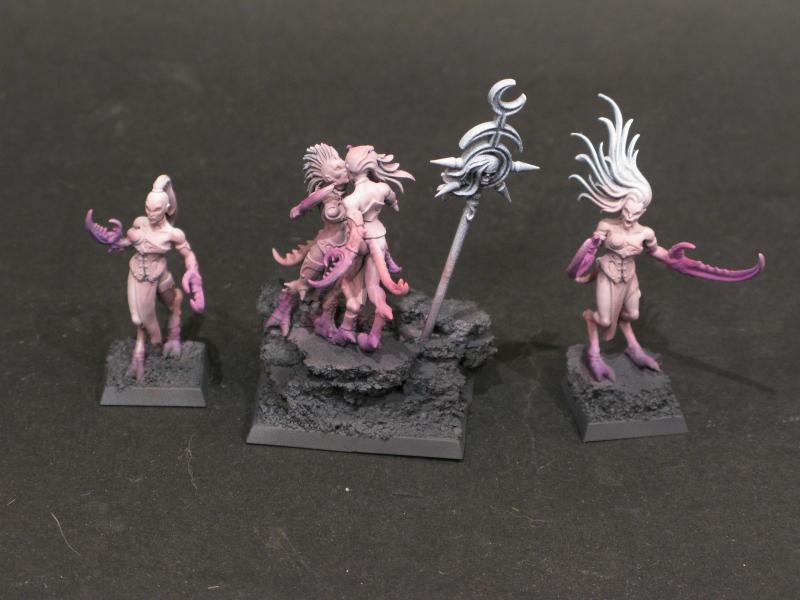
Step 3: (Airbrushed, Thinner + Vallejo Glaze Medium), Tallarn Flesh, Dwarf Flesh, Liche Purple (colour used throughout army), and Bestial brown, airbrushed on the 'flesh', mix was roughly 1:2:1/2:microdot
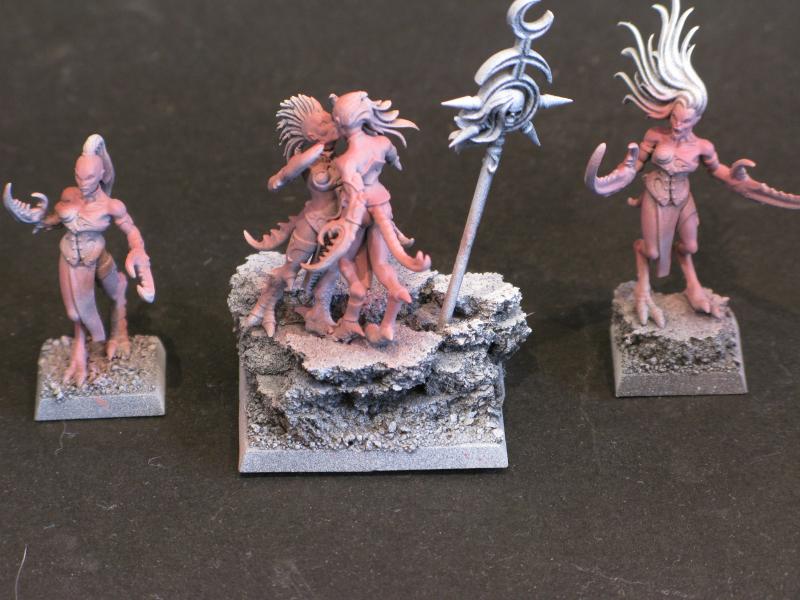
Step 4: (airbrushed, Thinner + Vallejo Glaze Medium) Liche Purple + Vallejo Glaze Medium + Thinner (Gin as normal) on the feet + crabby bits, fairly carefully, but no need for painstaking precision, the fact that the mix is thin, and that purple is everywhere on the model means it's forgiving if you make mistakes.
1:1:1 Ratio
Step 5 (airbrush, no glaze medium now): Add Dheneb stone to the mix from Step 3, spray this on the fleshy bits from above, again about a 45 degree angle
Step 6: (airbrush, no Glaze Medium) Add Skull white to previous mix, shoot it right from above the model, and a few choices areas where light would catch from above, I did thighs and calves.
Paint bases black + codex grey 3:1 (carefully airbrushed, paint delicate bits close to feet if needed)
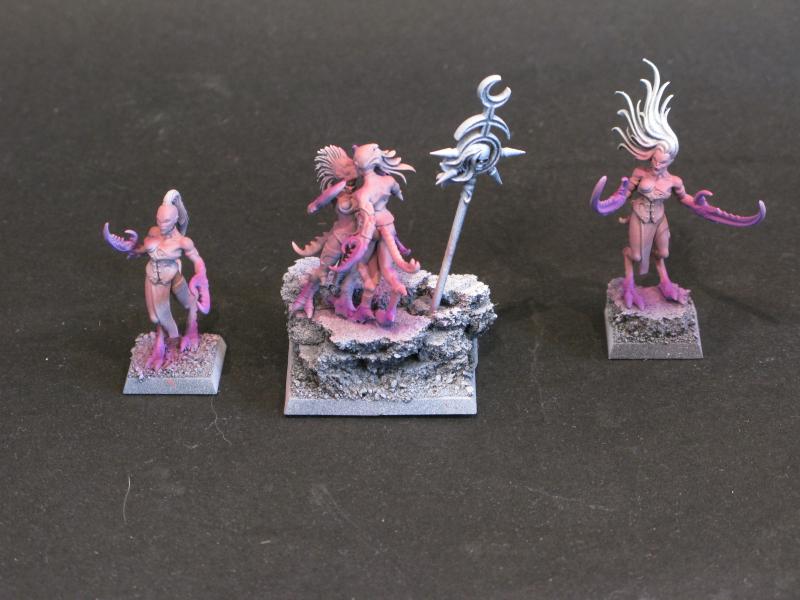
Step 7: This is the magic step, using a mix involving citadel washes + your key colour + glaze medium wash the model all over, it'll homogenise the blending and smooth out rough bits,
Ogryn Flesh:Leviathan Purple:Gryphonne Sepia: Glaze Mediu + Liche purple (as the last is a 'proper' paint you'll need very little!).
1:3:1:1:dot
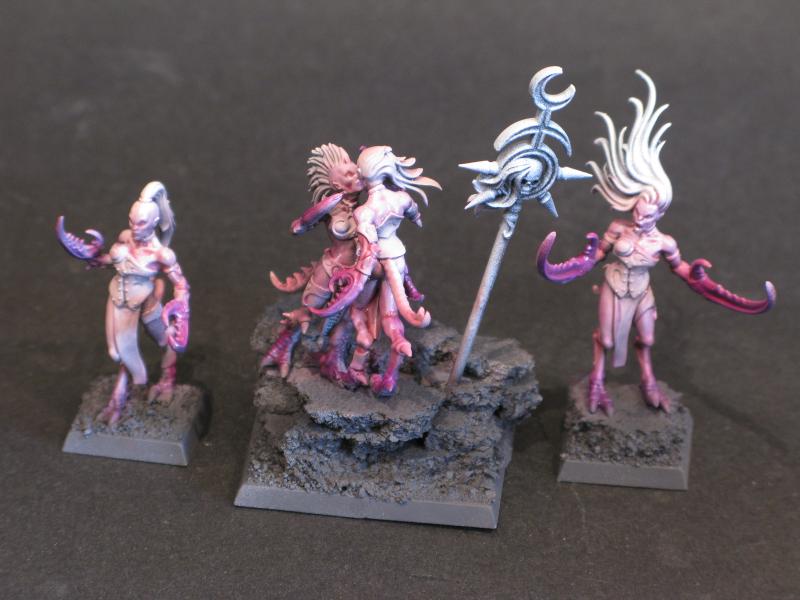 Detailing, this is all down to the model you're doing, these are fairly sparsely decorated, armour, spiky bits, eyes.
Step 8:
Armour, undercoat black, this will ensure the silver has good coverage:
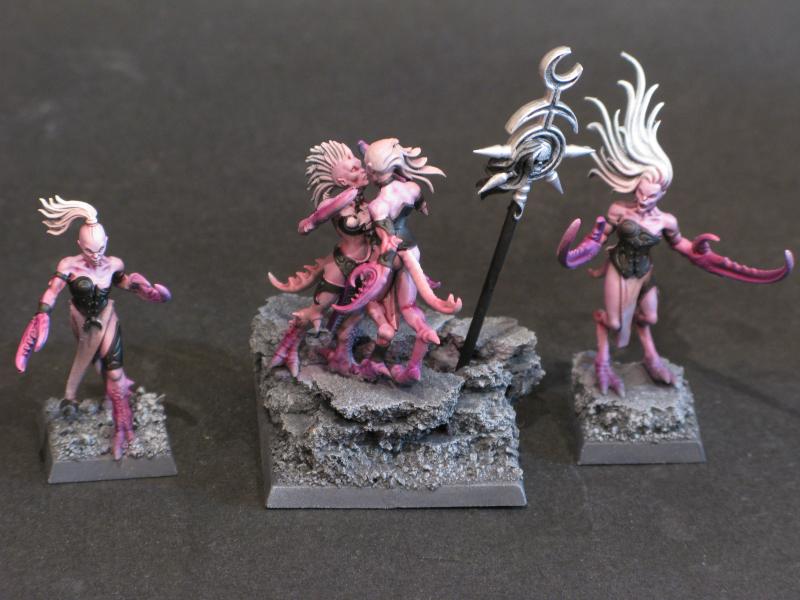
Step 9: Chainmail on the armour, let it dry then a mix of leviathan purple and liche purple was used all over
Step 10: Final details.
Hair: Dheneb Stone, Skull White, and a tiny dot of liche purple (notice a theme?) as a base-coat
Step 11: Hair Highlighted with the previous mix + skull white
Step 12: Bones painted bleached bone + Dheneb stone, eyes carefully 'dotted' with the same mix.
Step 13: Basing: Drybrushed codex grey, scorched grass used to detail.
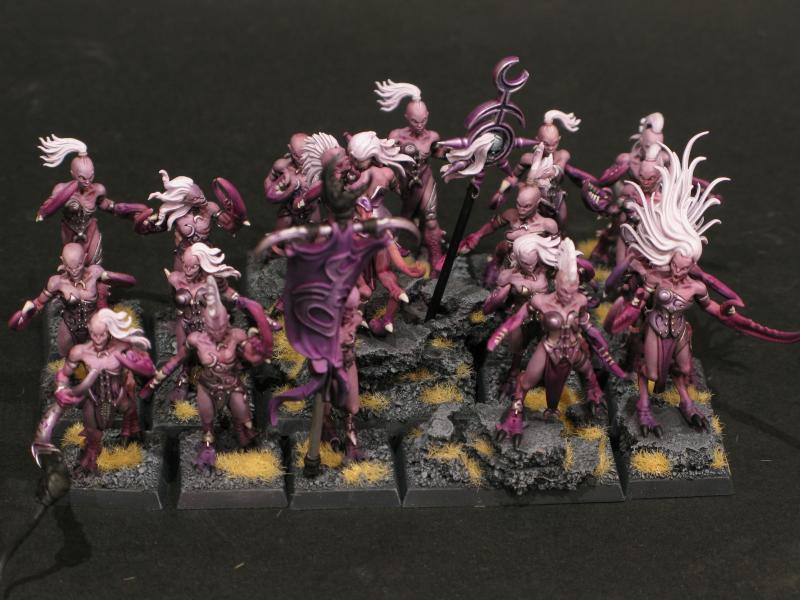
Done! Final Product:
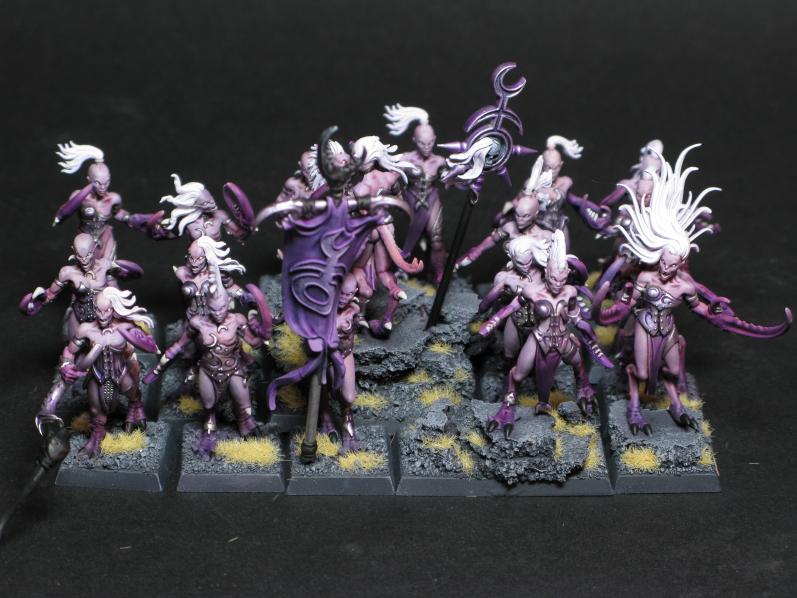
And under a daylight bulb (looking a bit evil...)
Any questions feel free to PM me, ask on our twitter etc.
Finally here's the slightly wordy theory behind painting schemes like this, ignore this if you like

I'll endeavour to keep it fairly short!
A scheme like this has 3 main aspects which (try to) ensure its success:
1.)
Start BRIGHT, there's no highlighting, just shading, so you want a bright base to then bring down, rather than the opposite, which is more common. This is why I used white in highlights, which I normally shy away from, as it tends to make things look 'pastel-y', the wash counters this, and the bright layers underneath ensure than the model isn't dull. Preshading (the black underneath) ensures that some realism remains.
2.)
Transparency (provided by the glaze medium) ensures that the work put into preshading/previous layers isn't lost, also slightly transparent paints are very forgiving, you're not painting an absolute colour over the last layer, so a slip is less noticeable. There are two ways to remedy mistakes, one is to never make them, and the other is to assume that you will, and plan for it
3.)
Pick a simple scheme and stick to it; in this case liche purple, with a dark basing scheme to make it stand out. Use one or two colours to really 'pop' out, this will both draw attention to the models, and pull it away from any mistakes you've made elsewhere, bonus! In this example the nearly white hair performs the job.
This technique is universally applicable, and works very well in a variety of manners, without the airbrush you can still do it using drybrushing between layers, the wash still performs its job of smoothing things up.
Byron
What our customers are saying...
Sign up for our newsletter - for the latest news and promotions
Element Games Team
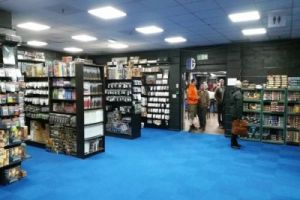
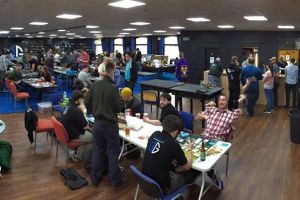
Stockport Store and Gaming Centre