Buildings 2: How to Paint Dreadstone Blight (+water effects)
If you have any questions / comments, please feel free to post on the forum thread for this tutorial.
Given my camera failings on the Skullvane Manse tutorial when I decided to paint up my
Dreadstone Blight recently I thought I'd do a complete step-by step to remedy this.
Kit Overview
The guide covers the painting, but I'll give a brief overview of the kit first. Initially of note is the value for money that you get, this is a substantial piece when built, not only that but the way which it is assembled/broken down means that you could easily break it up and get 2 parts from it. The base in its own right looks like some type of dais/summoning circle/generic magic hotspot, and you could put the tower walls on whatever base you liked. It's about 15quid, and I think you get a lot for what you pay - especially if you divide it into 2.
Also I think it may well integrate with other pieces, such as
Witchfate Tor, I could be mistaken here though, so please let me know if they have different diameters.
Painting Equipment
Large drybrush (if you don't have one get one, drybrushing is at least 50% of the painting time)
Paints, as a minimum
Black, White
Dark brown - light brown
A bone colour
Whatever colours you want to do the stones in the centre
A dark wash and a brown wash.
I'll of course say which colours I used throughout the tutorial, but given that I'm still using the old, and now out of date citadel colours I haven't listed the specifics above. As with any of the painting tutorials it's the sequences that're more important, as opposed to the colours. If, for example, you wanted to make the bricks look like sandstone you could substitute the grey-white gradient for a terracotta - bone one.
Put together your kit, I left the base, walls, floors, and stairs separate. I based mine, as I wanted to use water effects, given that there's some drainage-type-features in the base.
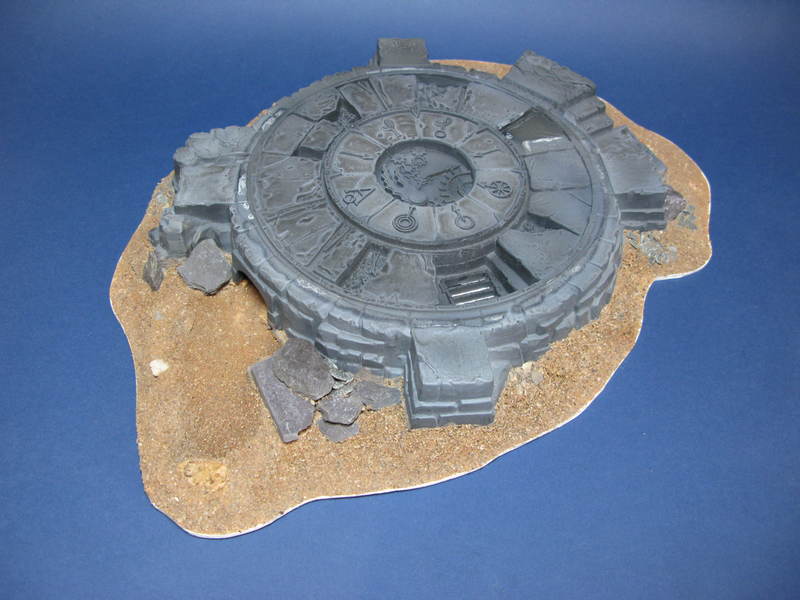 Step 1
 Spray the parts chaos black
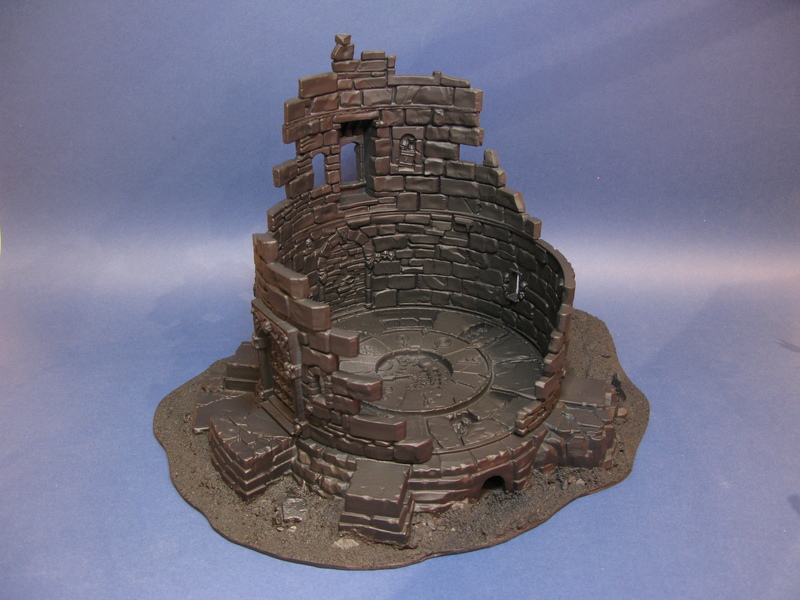 Step 2
 Codex Grey, all over - heavy drybrush
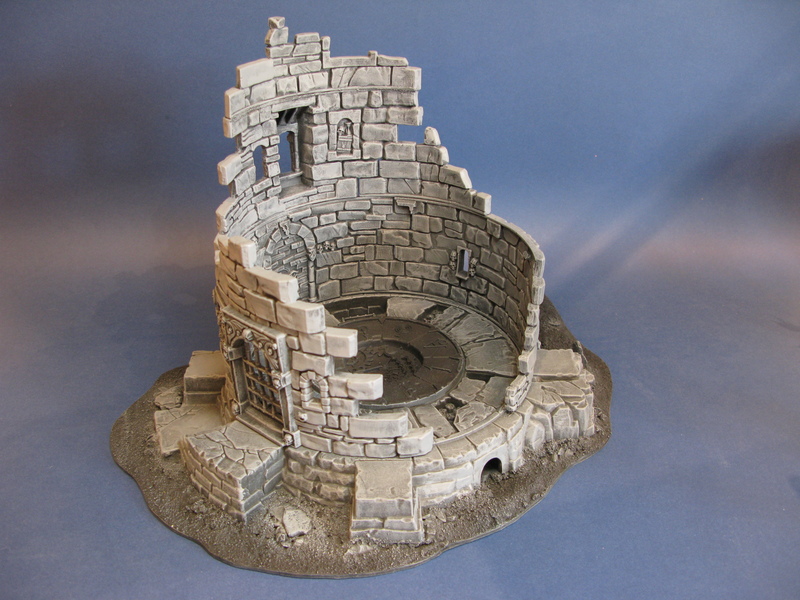 Step 3
Fortress Grey, all over, slightly lighter drybrush
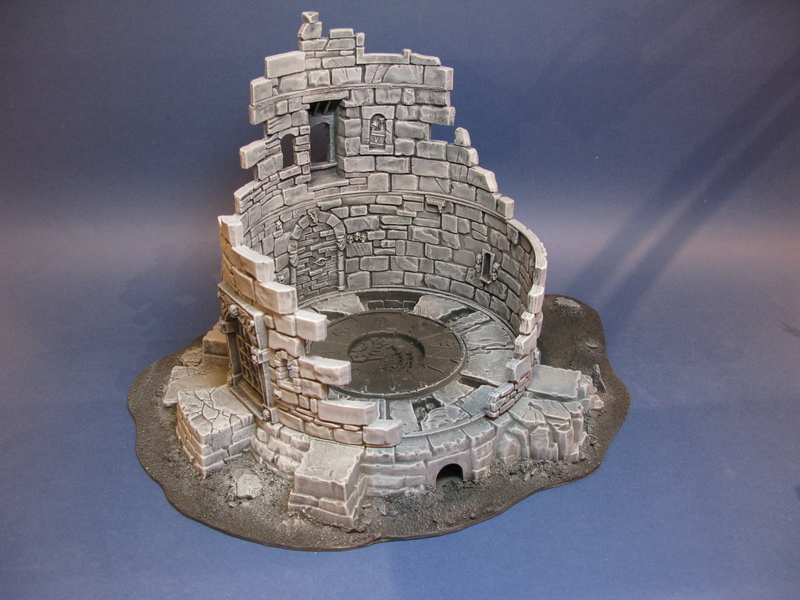 Step 4
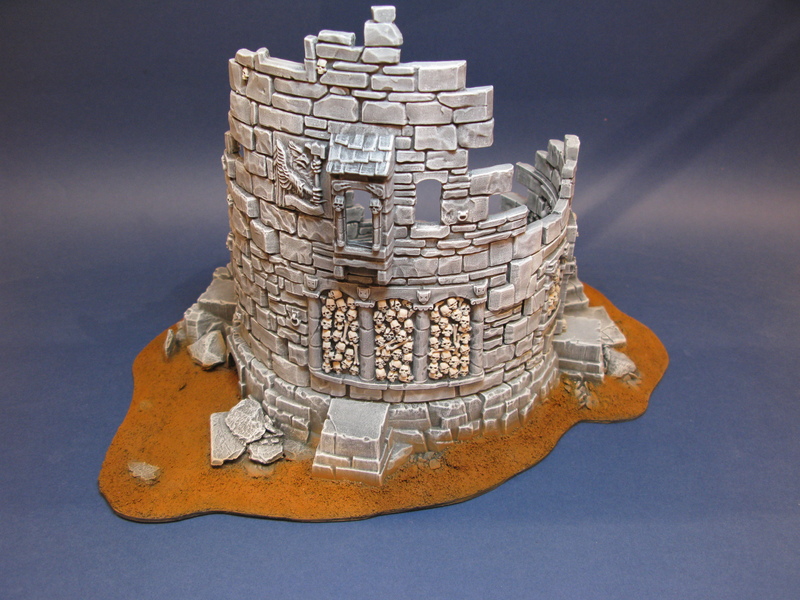
 A final, and very iportant drybrush, lightly but thoroughly go over the entire lot with skull white, this'll ramp up the contrast quite a lot, it's worth washing your brush before this to make sure it really is white.
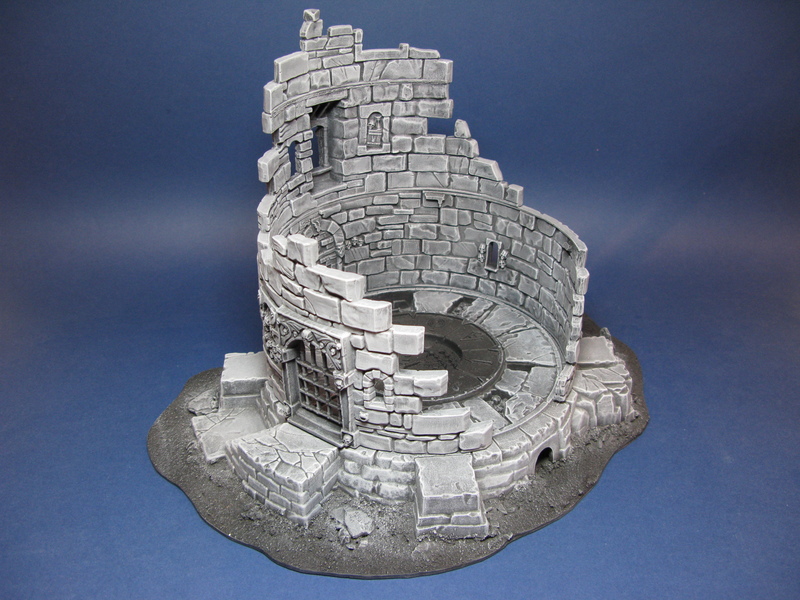 Step 5
 At this point I wanted to see if the contrast was o.k with the ground, so I based the earth with calthan brown + bestial brown, don't worry about getting it on the lower parts of the building, they'd be dusty anyway, I used the airbrush, but a big old tank brush or something similar is fine.
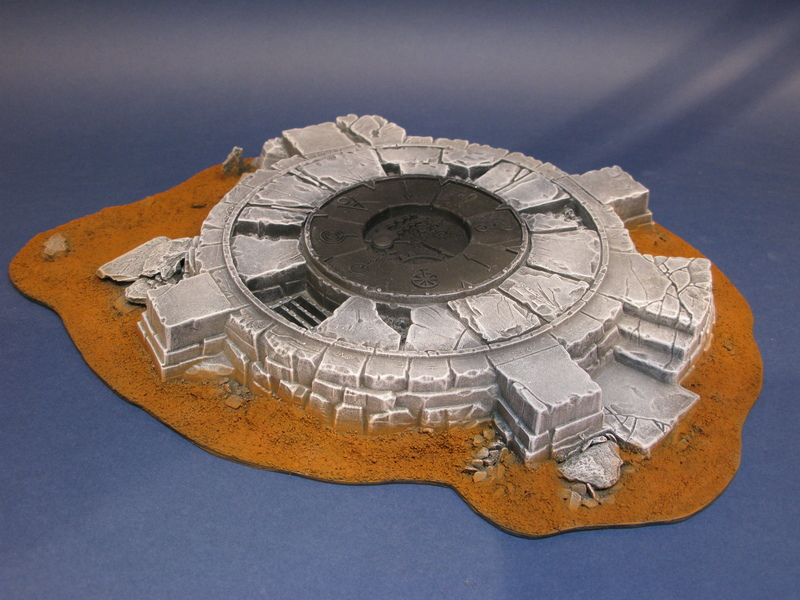 Step 6
 Base your centre stones with dheneb stone, or another bright white-ish colour with good coverage, I wanted these to stand out, so this makes sure the final colour is bright
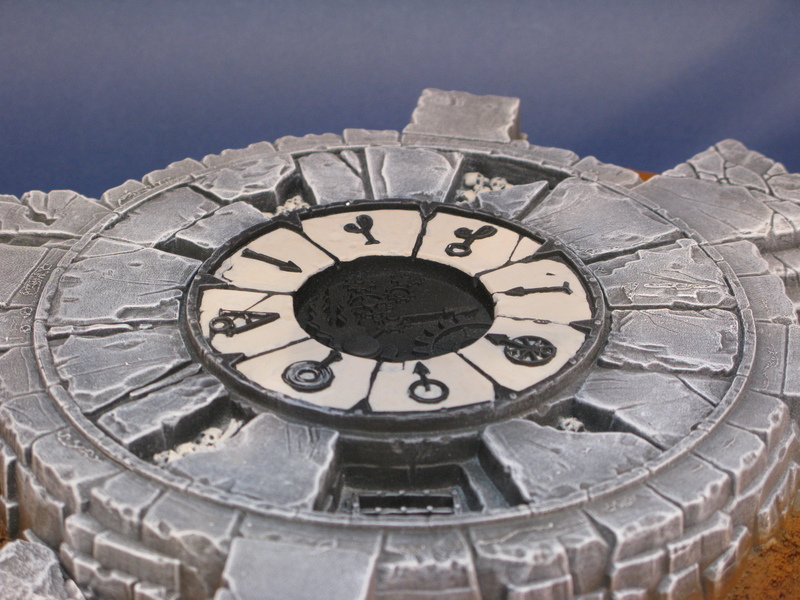
While you're at it get the 500 inevitable skulls based as well

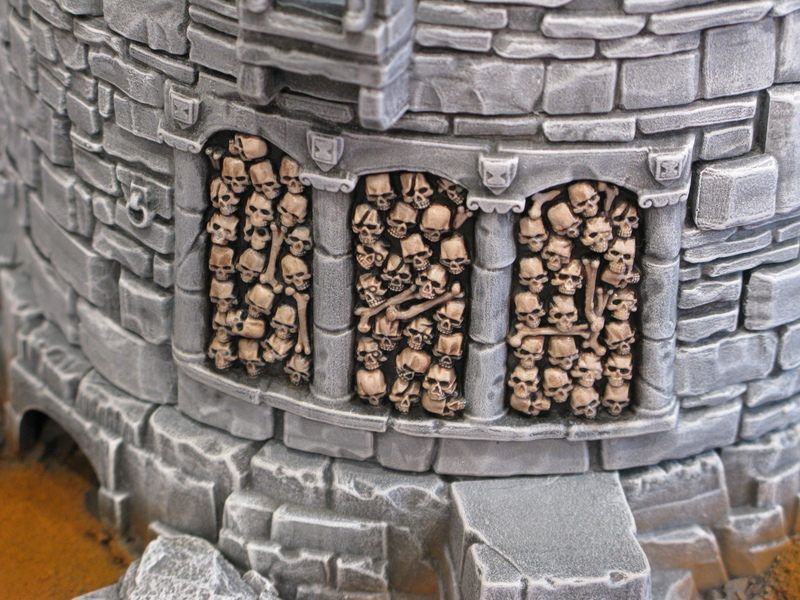
 Step 7
 Wash the skulls in any dark wash, I chose devlan mud, but if you want them yellowed then a sepia tone would be perfect, or really contrasted black would be fine, you could even use dip.
 Step 8
 Base all of the bits which're going to be gold/bronze in brown, I used calthan, as it's a foundation, and covers in one coat.
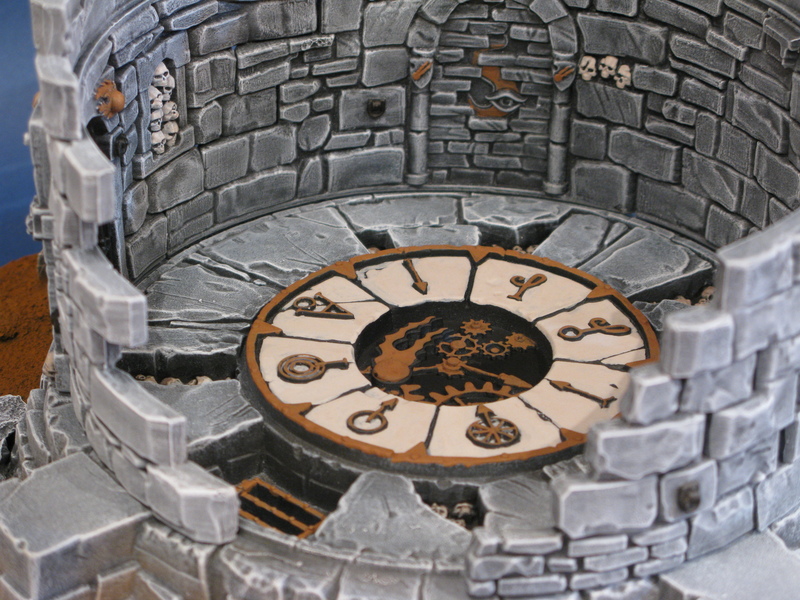
**Note - I made a slight mistake with the sequencing of the gold, I'll cover that soon.
Step 9 COLOURS! I mixed dheneb stone with the following colours, one for each stone: Ice blue, regal blue, camo green, golden yellow, warlock purple, snakebite leather, space wolves grey, and Iylandian Darksun. Take care not to cover the dark cracks, which'll keep contrast high, but also not to leave any of your base-coat of dheneb stone poking through at the edges. Don't worry if they look like some tellytubbies land, we'll dull them down to a more pastelly level soon.
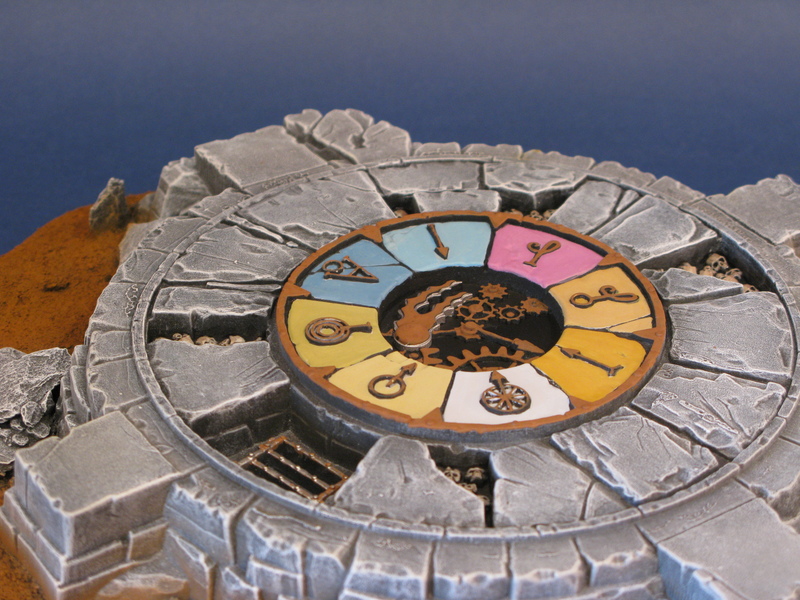 Step 10
 Gold! I used Vallejo Liquid gold 'old gold' which is an alcohol based paint, use a brush you don't care about too much, and don't involve water in the process, if you need to wash the brush between coats, and after do so in any generic strong alcohol, I used Gin.
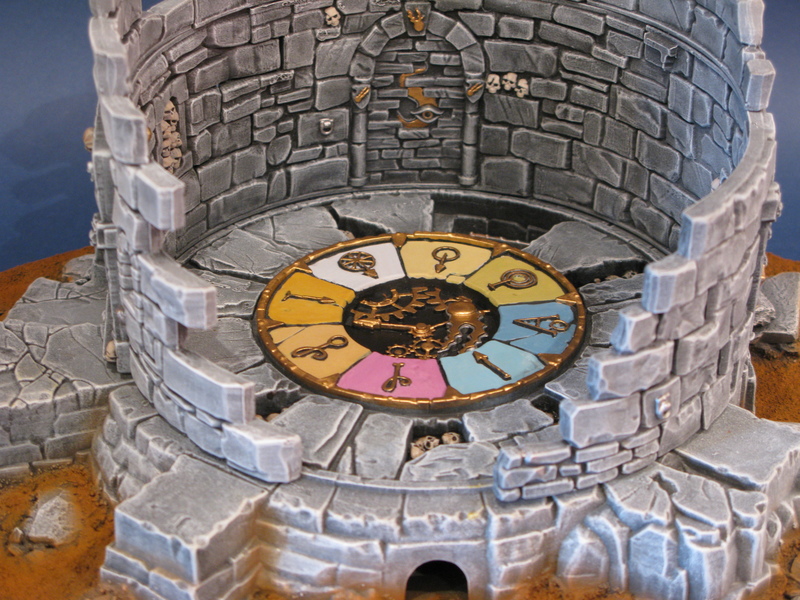
**I should have done this after the the next step, this is why sequencing is so important when using a 'messy' technique like drybrushing, I've included my mistake as it may be helpful to see.
Step 11 Drybrush the stones, and skulls with dheneb stone, this'll homogenise the colours of the stones, and make the slightly ore worn looking, if they're still too bright for your tastes you could wash them all with the brown wash used on the skulls.
Skulls:
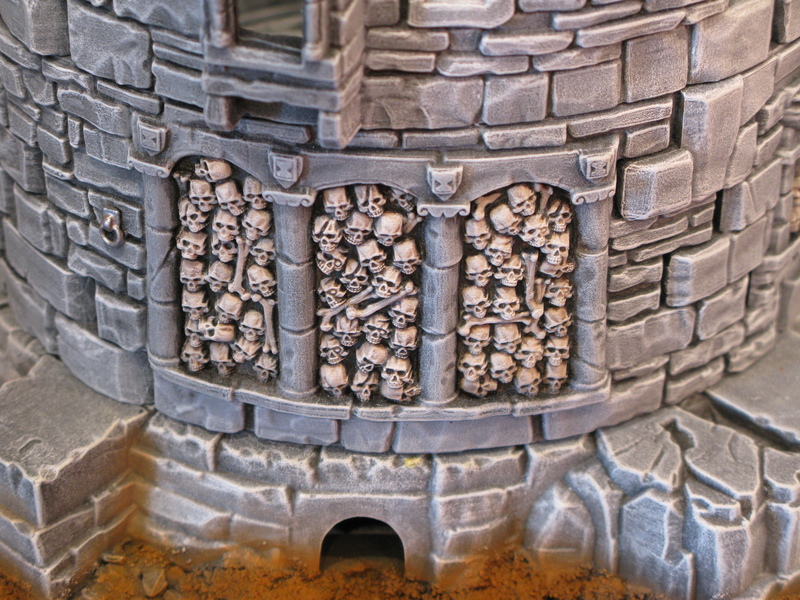 And the stones
 - here's my mistake, I messed up the gold with this layer.
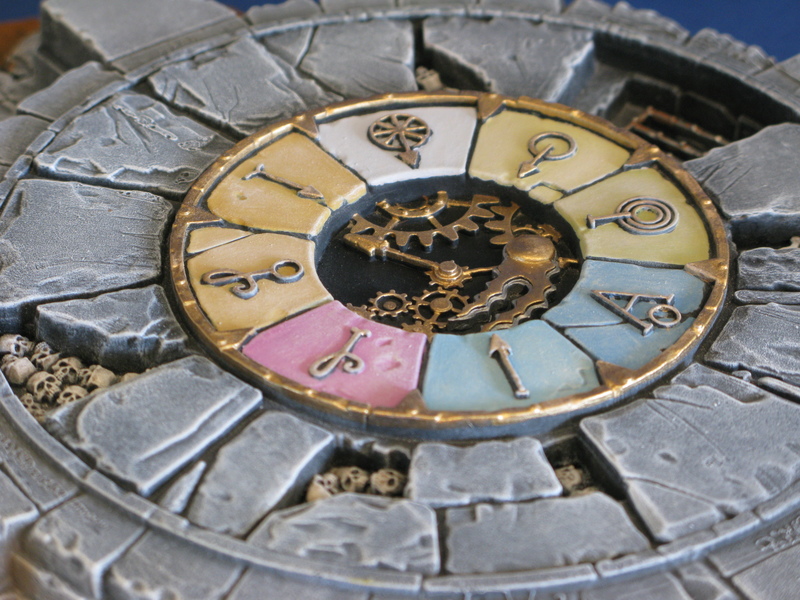 Step 12
 Gryphonne sepia with a little of a warm brown added (bestial in this case), all over the gold, this'll turn it bronze, and give it some depth.
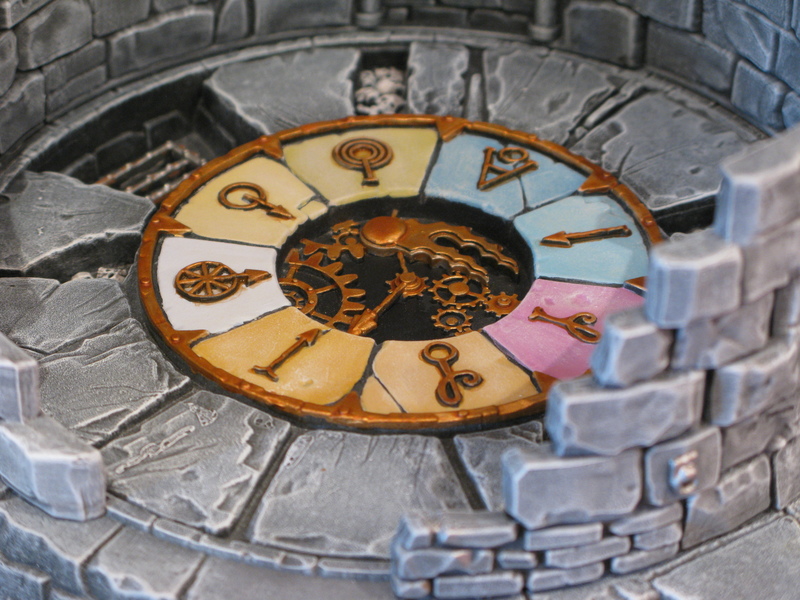 Step 13
 Devlan Mud next, concentrating on the recesses/pooling around rivets etc.
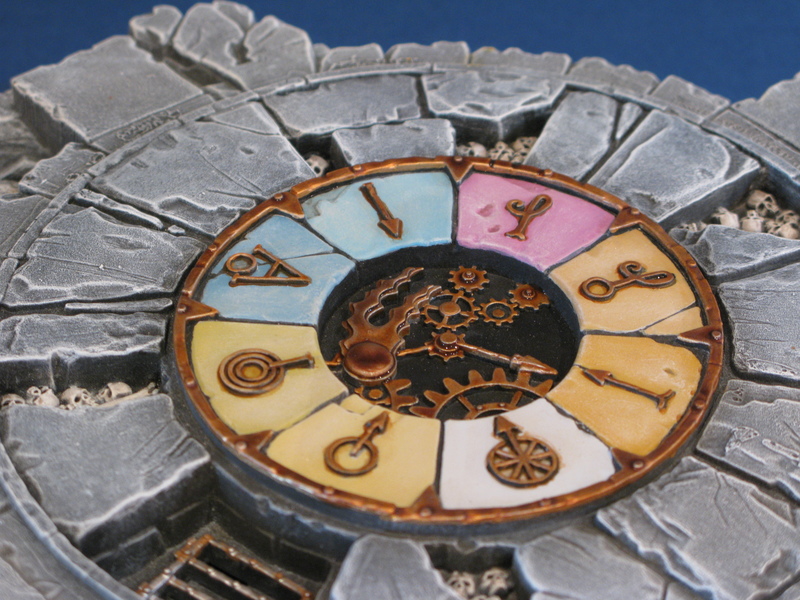 Step 14
 At this stage I was bored of fiddly stuff, so took a break before doing the verdigris, and drybrushed the base with snakebite leather.
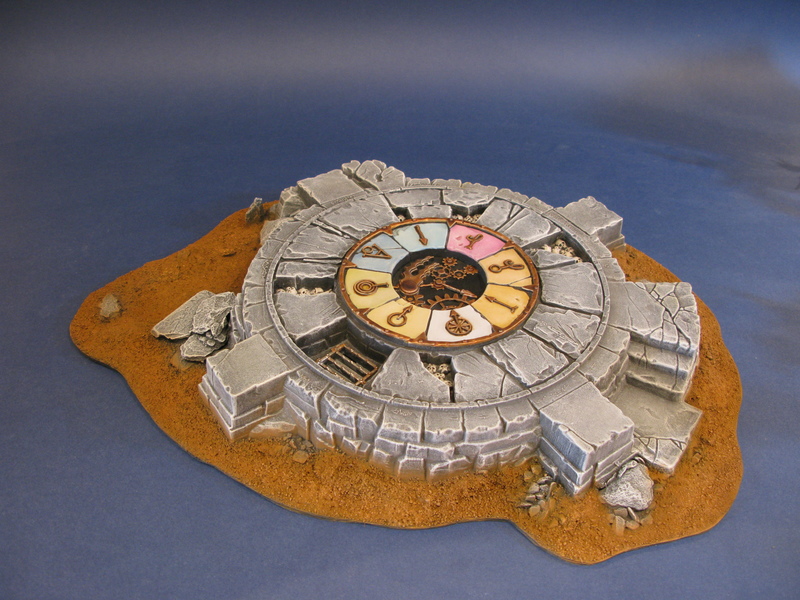 Step 15
 Snakebite + Bleached Bone, slightly lighter, again don't worry about getting any on the sides of the building, it'll look natural.
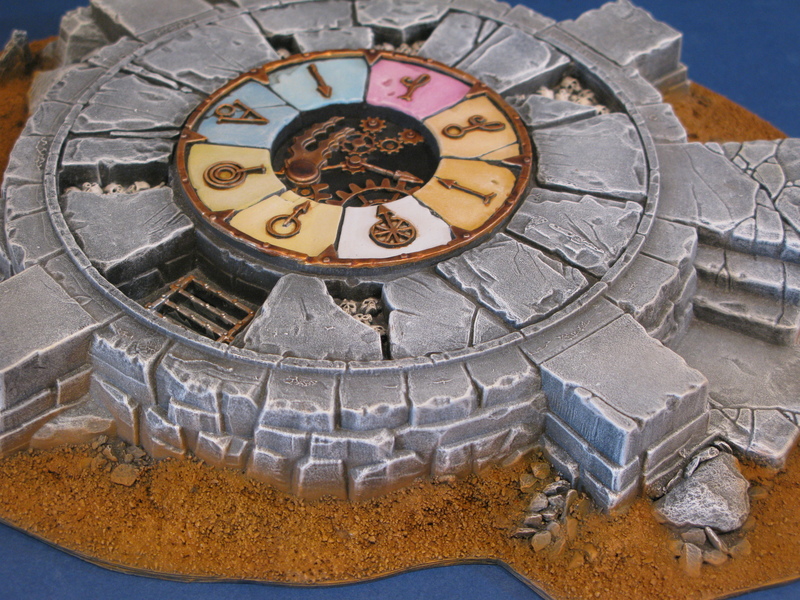 Step 16
 Pure bleached bone, very light, making sure nowhere is missed.
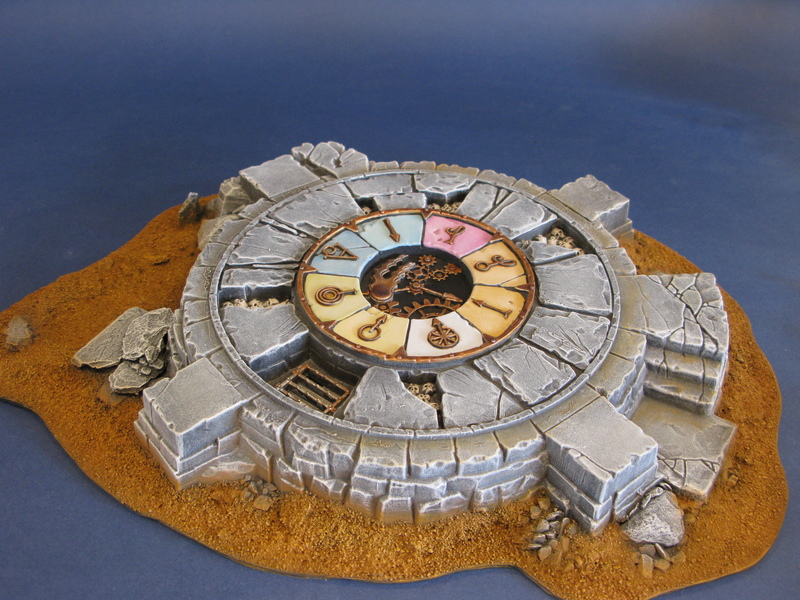 Step 17
 Verdigris! I love this - any excuse to use hawk turquoise, and it is a reliable way of adding interest to metals, water down hawk turquoise a lot, and wash it all over (make sure it's very thin, you can always do another layer when it's dried). - Check out my
Quick Verdigris Tutorial for more info
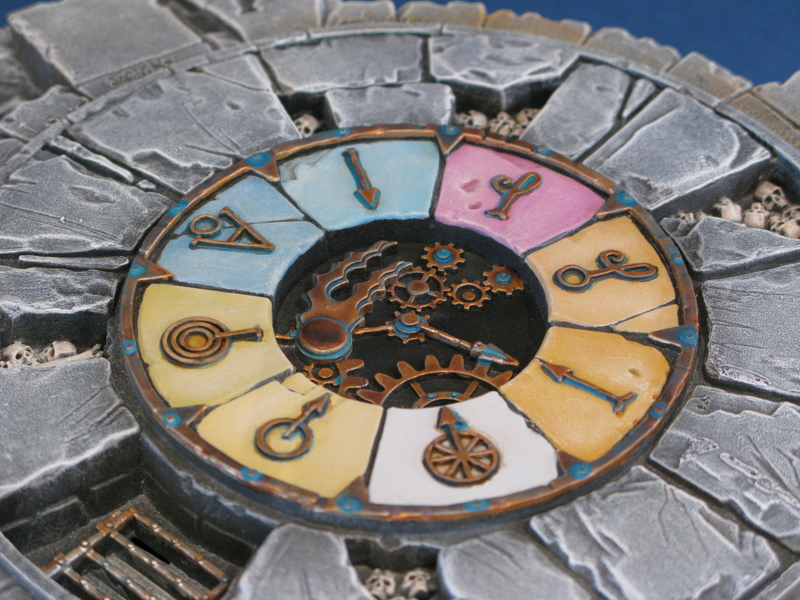 Step 18
 Inside your verdigris dot some (equally watered down) hawk turquoise+skull white.
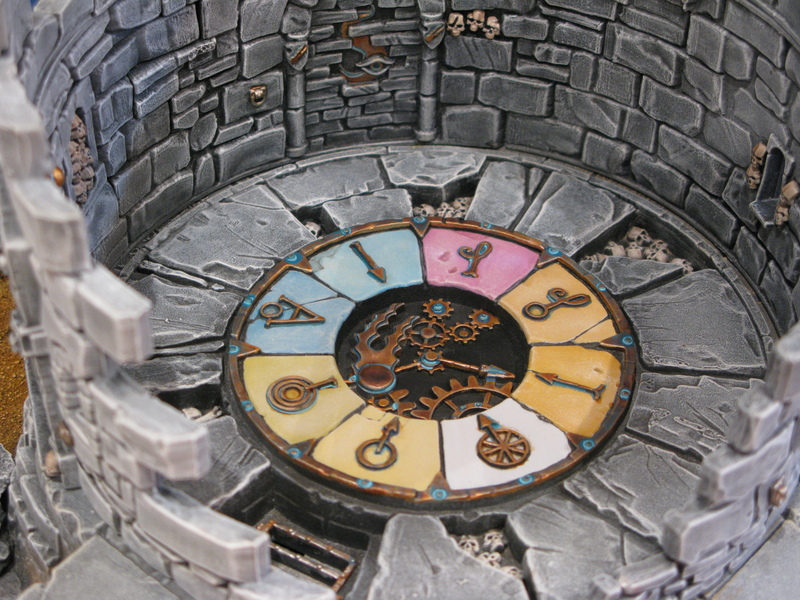 Base Detailing
Step 19
 This stuff is all personal taste, I used these three tufts:
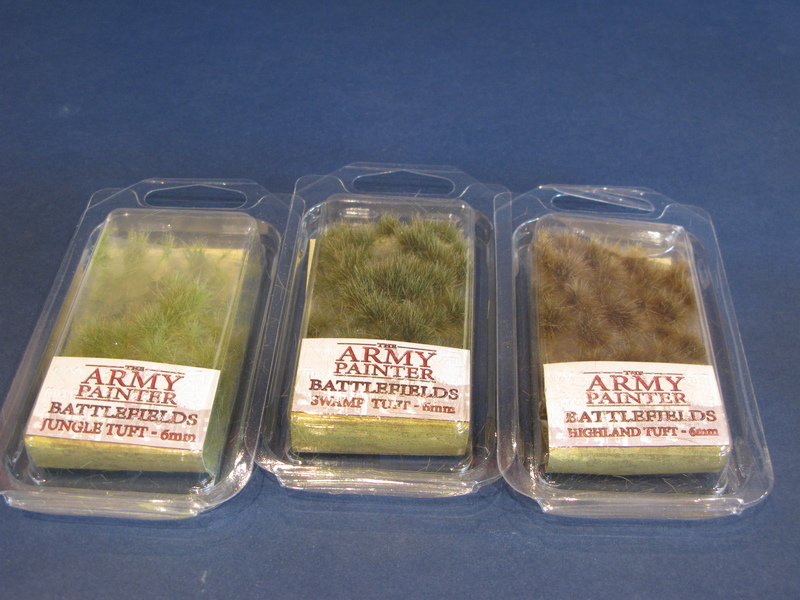
Greener ones closer to water, more dry and brown further away, mostly places inbetween rocks/slighlty shaded or sheltered areas.
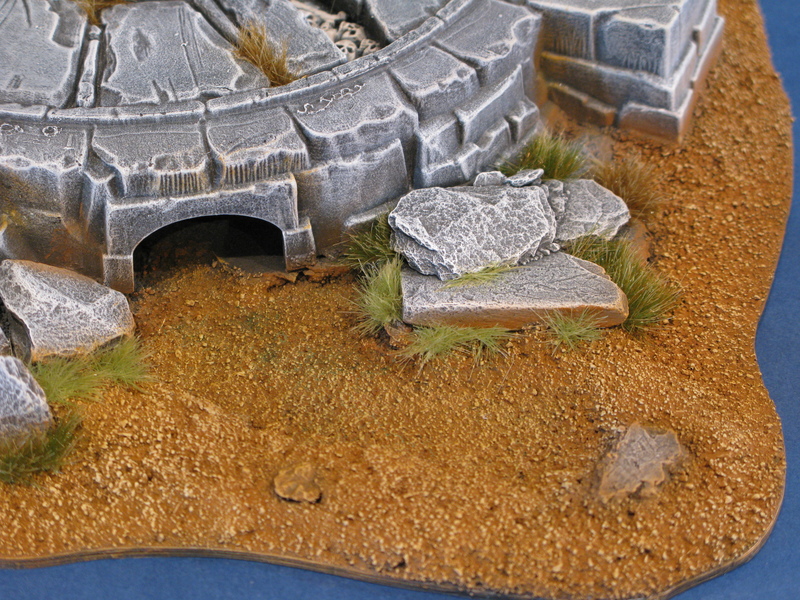 Step 20
 I made some reeds, (see
basing tutorial), and glue-gunned them down, this was the first time I've used the glue gun, and to be honest it's a bit faffy for this, in the future I'll just use PVA and wait for it to dry.
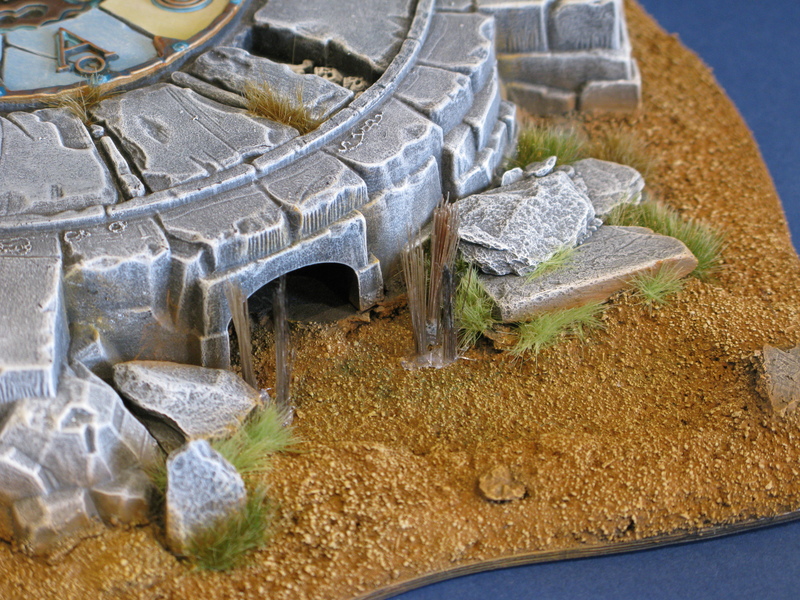 Step 21
 Water effects, I am using 'Vallejo Water Effects', I just poured it in, and then swished around some asermian blue, and thraka green washes, I used 4 or so layers, which each took about 12hours to dry, I used less wash in the 2nd layer than the first, and none in the following 2, this helped make the water look deeper than it is.
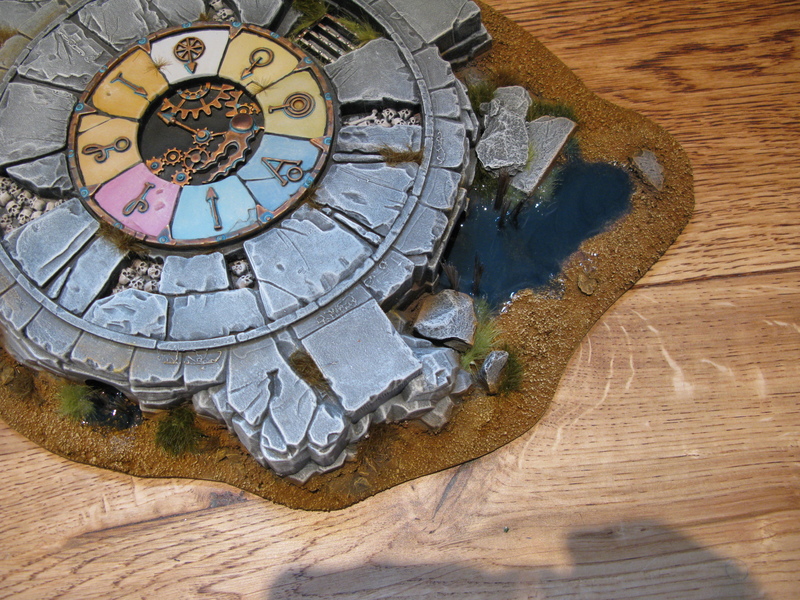
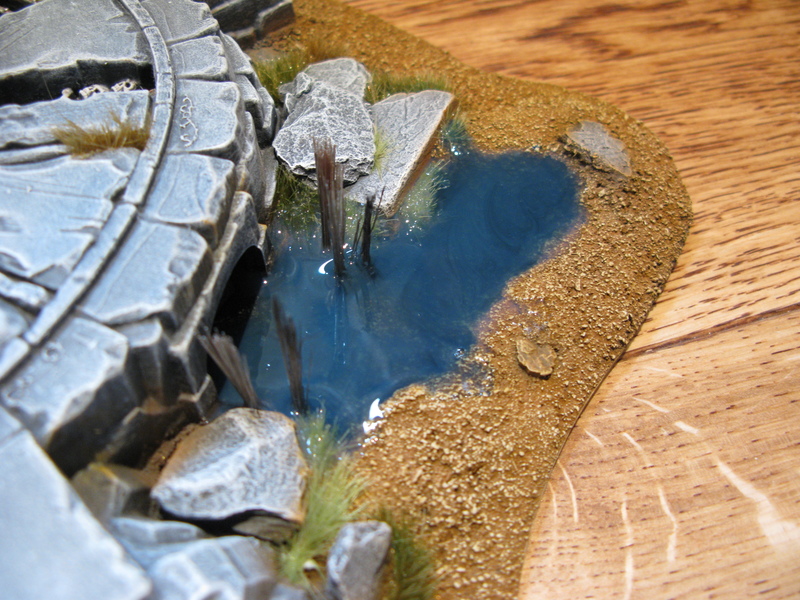 Finished (well nearly, wood to follow)
 I'll get some better pictures once the final layer of water effects has dried, and I've found the wooden floor sections to paint them....
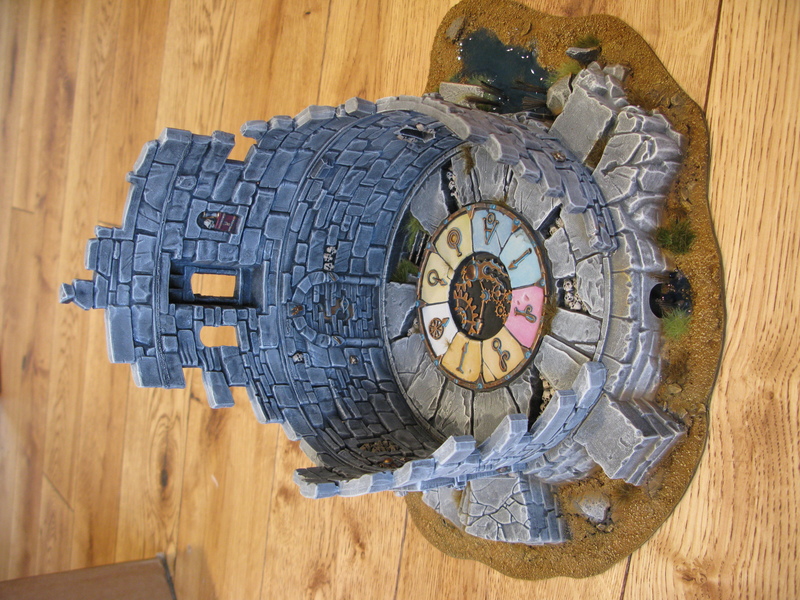
Cheers for reading as ever, all feedback/questions welcome here or on
The Element Games Twitter
What our customers are saying...
Sign up for our newsletter - for the latest news and promotions
Element Games Team
Stockport Store and Gaming Centre
