If you have any questions / comments, please feel free to post on the forum thread for this tutorial.
Sculpting: Scale Mail
This is a fairly simple one guys, I'm just getting back into sculpting myself and as with most of the sculpting I'm capable of it's nothing more than repetition and the right tools
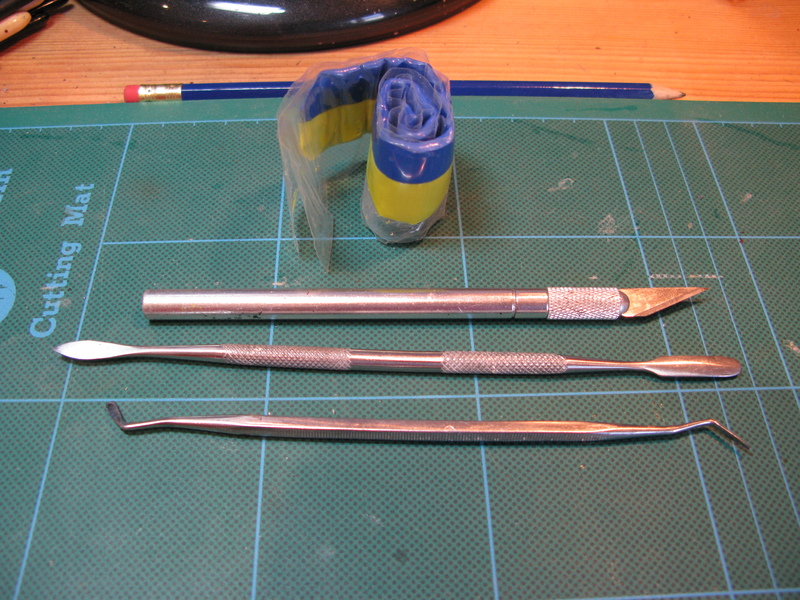
Materials Needed:
Green Stuff
Flat Edge Sculpting tool (can use x-act/hobby knife)
Smoothing Sculpting tool/fingernail
X-acto or similar Hobby Knife
spit/vaseline
All pictures are hyperlinks to my gallery if you want to browse through them there
So now the tutorial proper:
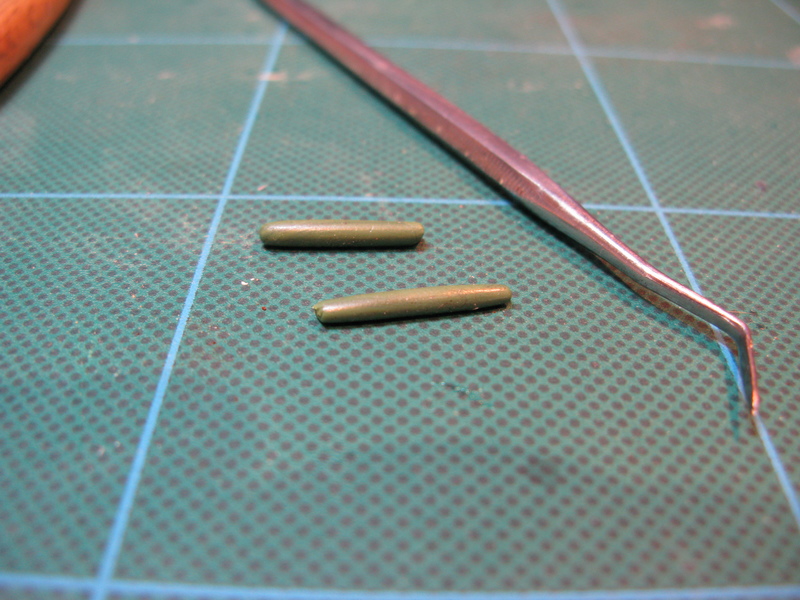
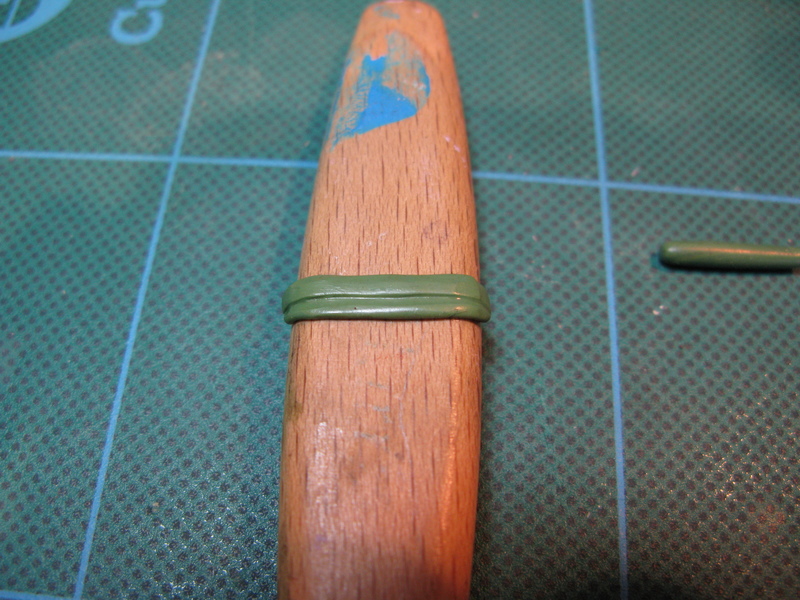
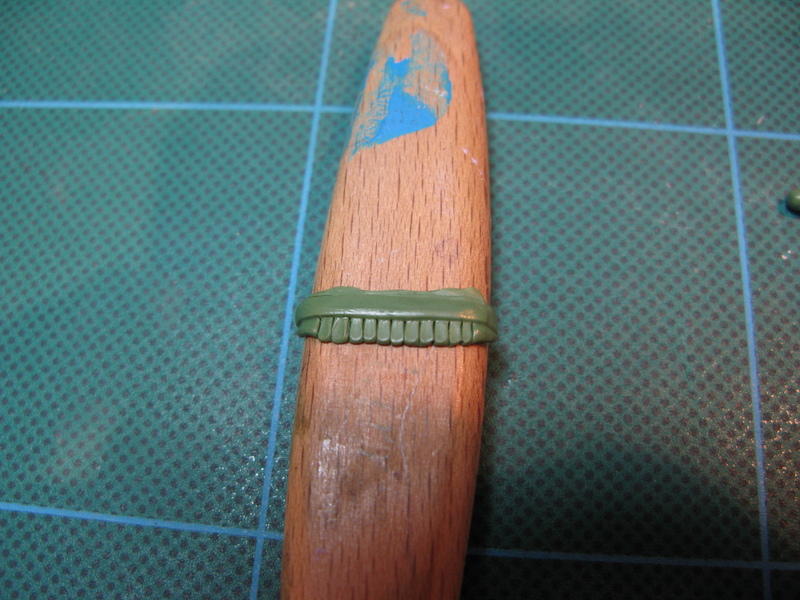
#1 Mix your Green stuff, always cut out/do not use the middle strip whee the blue/yellow touch they will have started to harden, and will be lumpy. Mix them up and roll out into a sausage, I find leaving them to cure for 20 mins makes the next step easier. Depending on the area you're looking to cover cut your sausages to size.
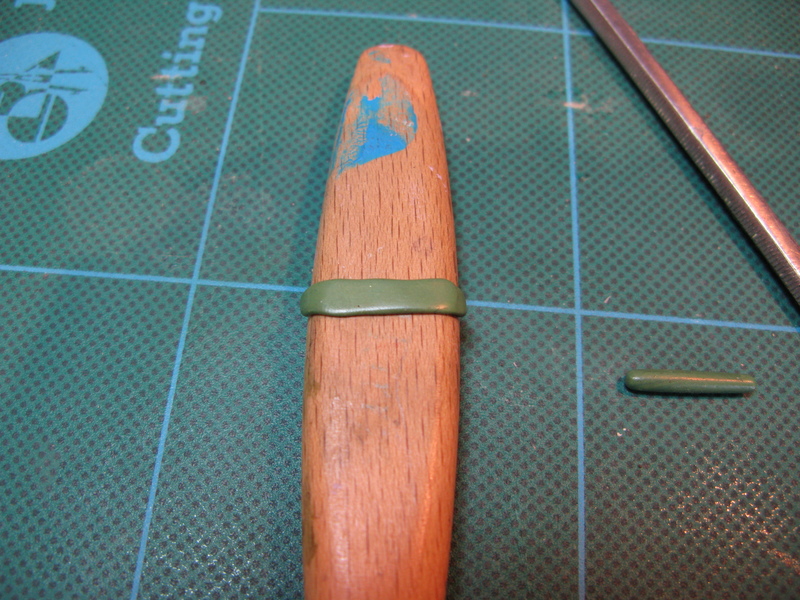
#2 Press a strip onto the area needed and smooth it out, I tend to use a wetted finger and then the back of the big flat tool.
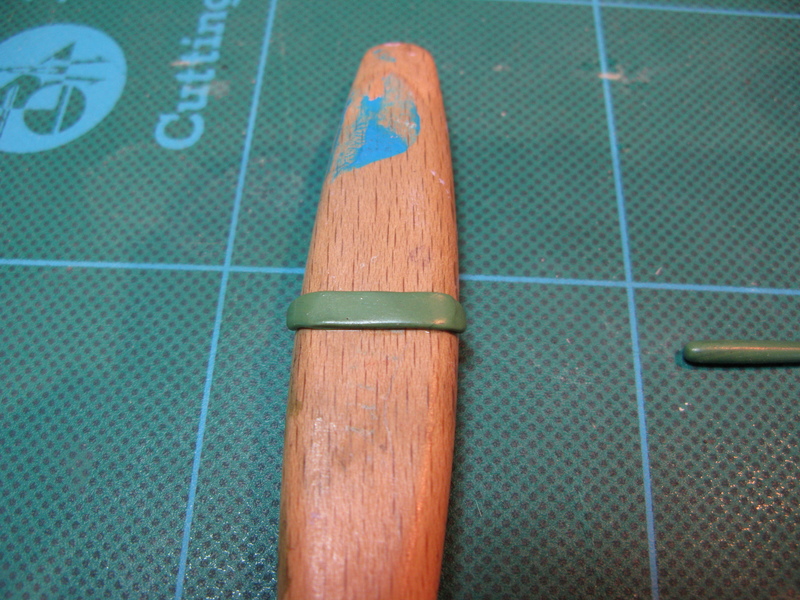
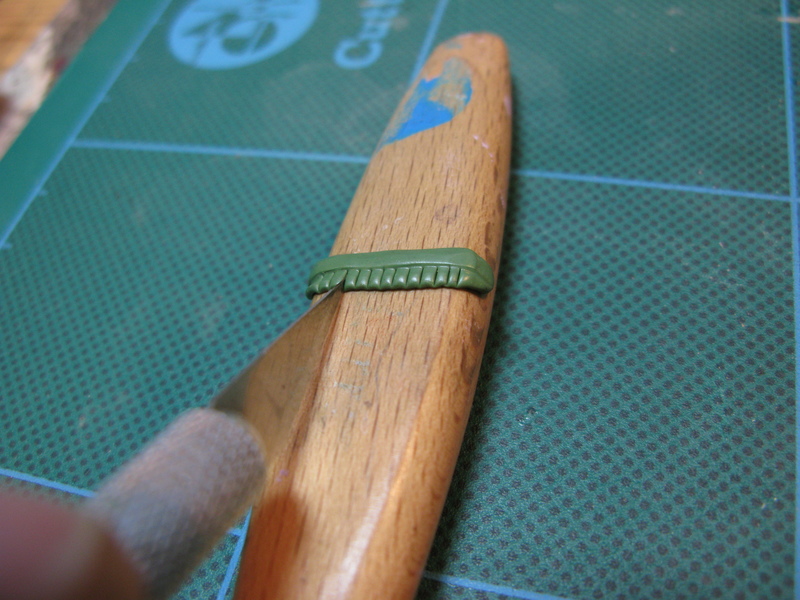
#3 Using the other tool neaten up the bottom edge to make it straight
#4 Carefully press a straight line into the GS, making it so the GS flares out at the bottom.
#5 Using Your Knife (+vaseline to stop it from sticking, or water) press the edges of your scales into the GS, how wide or tall is entirely up to you, these ones are going to be a bit high-elfy.
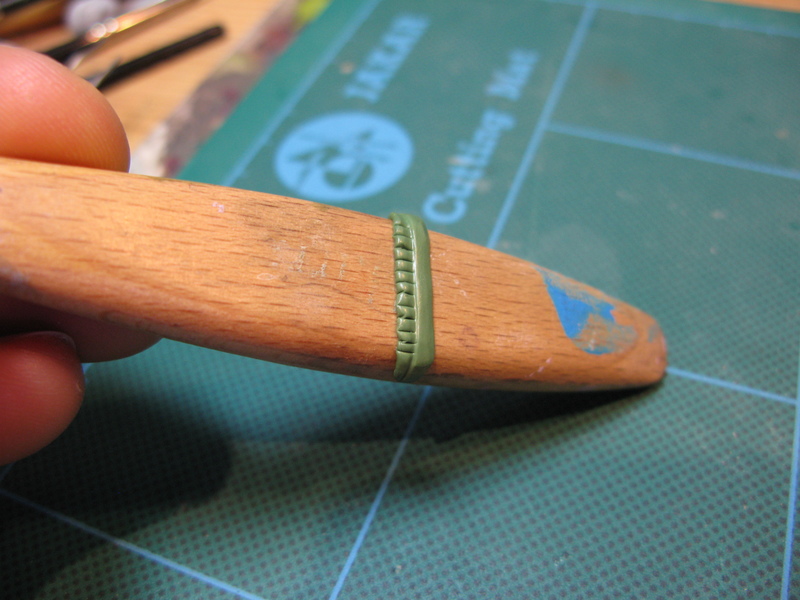
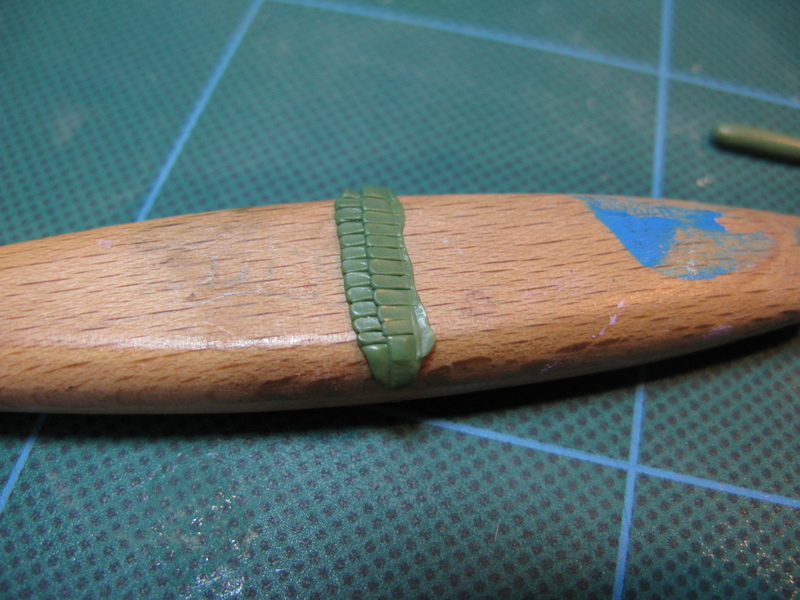
#6 Turn your model upside-down and press into the bottom of each recess, this step isn' 100% necessary, but it'll neaten things up a little, and help the scales to not look as square, if that's what you're after skip this step.
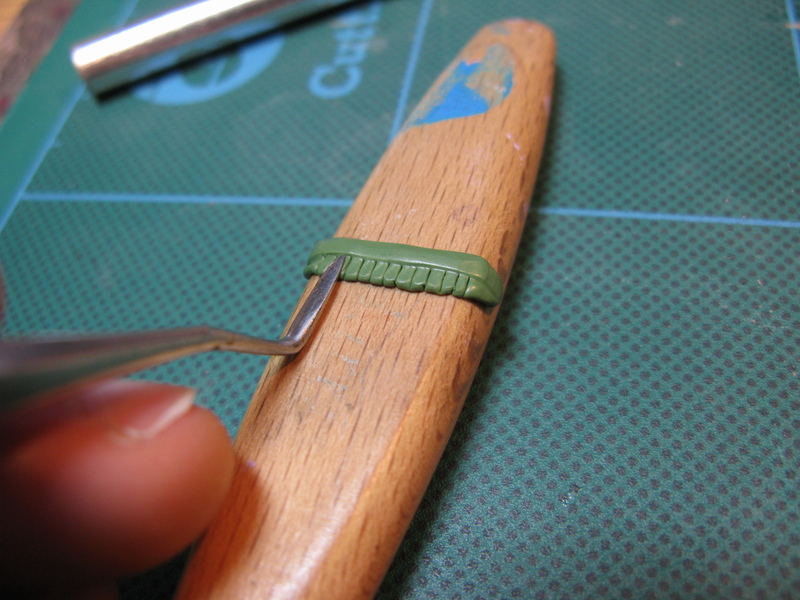
#7 Using the small flat sculpting tool carefully press and 'pull' downwards on each scale, no lube needed here, the GS sticking to your tool is what will allow you to 'stretch' each scale downwards and get the desired shape.
#8 A bit more 'pulling' down and you'll get something like this, flatten out the top part of the green stuff in prep for repeating the previous steps.
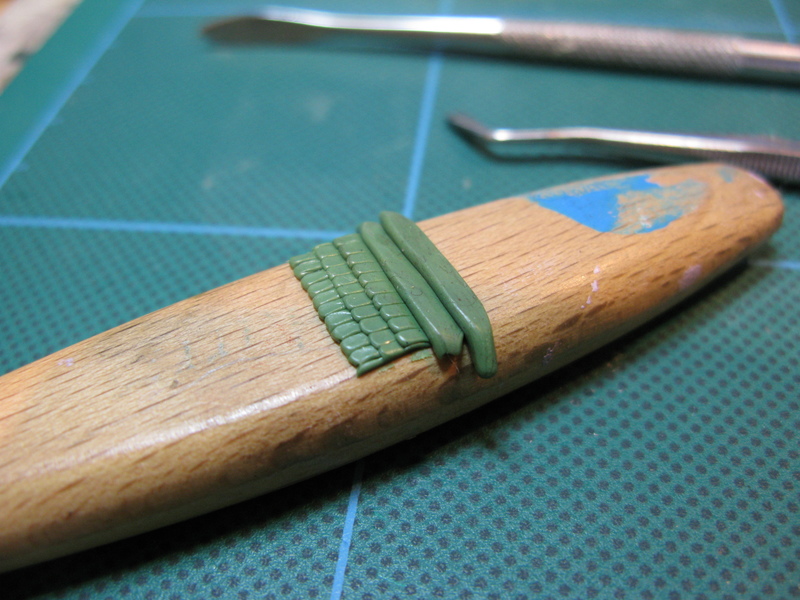
#9 Woo for repetition!
#10 And more sausages, this is why I prepare it all at the start, if it's all taken from the same lot then it'll be a very similar thickness etc - which leads to regular scales.
#11 Flatten them out in the flares shape as before, should look a bit like wooden blinds:
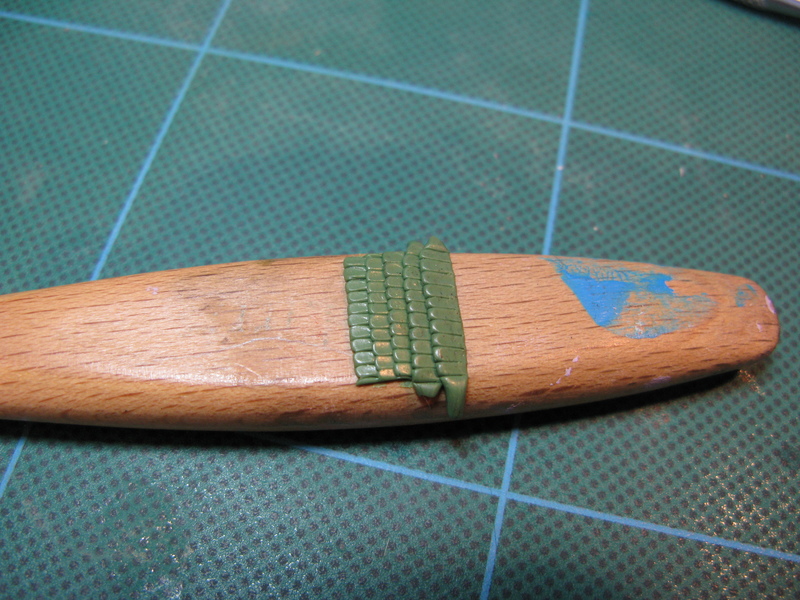
#12 Repetition repetition repetition:
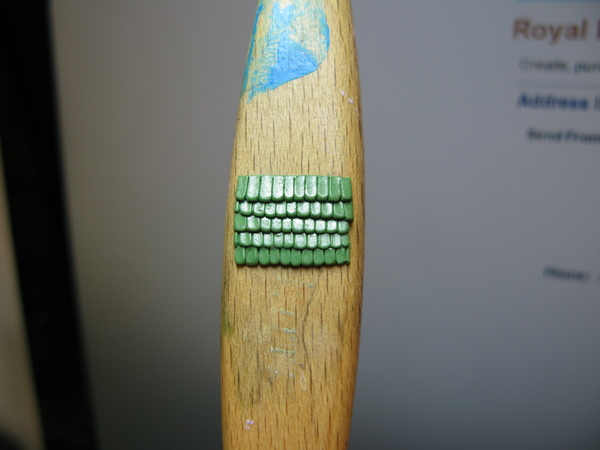
#13 Finished it should look something like this:
Stuff to note
-Your guide for the lot of scales will be the first line of them, therefore it's worth getting this right! As evenly spaced as possible will save you a lot of faff in later stages, if it does go tits-up then rip it of and start again, this is one reason for not putting one big flat bit of green stuff on and working from that.
-If you are being super-careful/sculpting on a character or something you can leave the GS to dry between each set of scales, this way if you make a mistake at any point you can just pull it off without damaging the previous set, equally if you're doing it on rank and file/speed is necessary you can be a bit more risky and do it all at once, just don't rush it!
Most Importantly - repetition repetition repetition! Remember that if you do make a little mistake it really isn't the end of the world, the more scales there are the better they will look, and people's eyes will miss the mistakes, especially if they're not looking at your model from 6" away like you are when you're sculpting it!
Second most importantly sculpting is all about experimentation, play around, do it different ways, if anything interesting comes up/you want to show your scales off why not post it below.