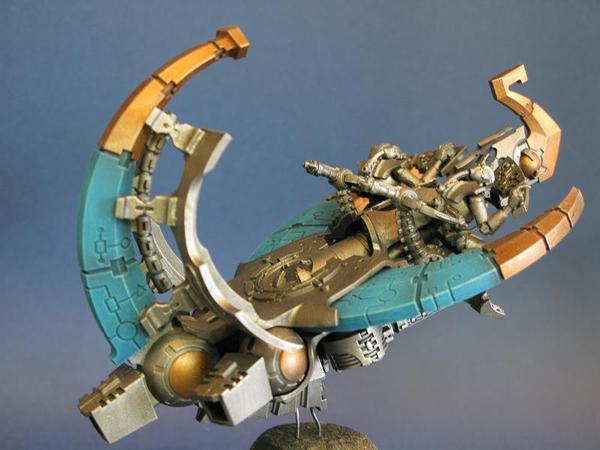
Sequencing + Airbrushing (Vehicles: Annihilation Barge)
If you have any questions / comments, please feel free to post on the forum thread for this tutorial.
Colour Sequencing: An Introduction � Necron Vehicles.
Colour sequencing comes into every model we paint, when using certain tools; the airbrush, washes, dips, or techniques such as drybrushing it becomes even more important.
So, what is colour sequencing? As far as I see it, colour sequencing is the way to most efficiently paint your model according to the individual qualities and properties of the paints which you want to use, and how you want them to come out. It's as simple as that, and can come down to something as basic as priming your model white for more vibrant colours, or realising that the stage of drybrushing you are planning on is going to mess up everything around it, and therefore has to come first. Both of these examples will come into play later.
I find the best way to learn is by doing (or seeing), and I'm pretty good at rambling so I'll cut to the chase. Here is a stage by stage set of photographs of a necron annihilation barge which I painted. Underneath is a small explanation of each stage, and if applicable the reason why I did the stages in the way in which I chose. Please forgive the couple of pictures I forgot to take, the painting psyche was upon me!
1.)'Preshading' begins: (Airbrush)
Areas to be turquoise sprayed white, black lines traced down major joints. The white undercoat ensures a vibrant colour, and is necessary for the 'preshading' of black lines between joints.
The downside is that the details on the panels which I want dark are impossible to avoid. This will be dealt with later.
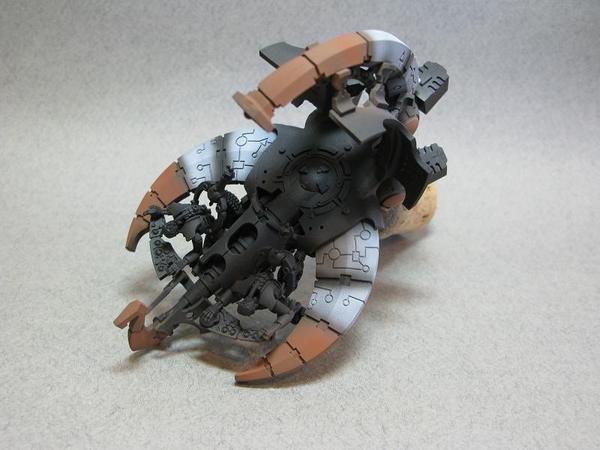
2.) Areas to be gold sprayed brown (I used calthan brown for foundation paints' easy coverage). There is no need to be too neat here, the brown is just to ensure that the gold goes on easily.
As a rule of thumb gold and bronze go down better over browns, whereas silver metallics need a black undercoat. With brown undercoats they will have a slight effect on the final colour, the darker the undercoat the 'deeper' the colour (suits bronze) the lighter the brighter (more suited to bright gold/copper etc).

3.)Hawk turqoise! (airbrush) Diluted with alcohol in airbrush as normal to the consistency of skimmed milk, as I want the work underneath to show through. I also added 1 drop of Vallejo Glaze Medium for every 5 of Hawk turquoise.
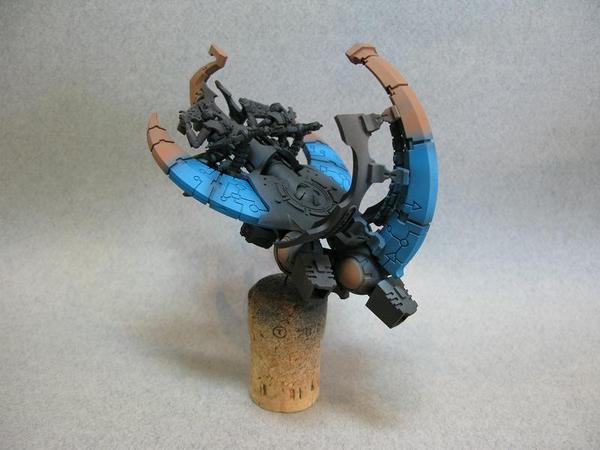
4.) Hawk turquoise + Rotting flesh + bleach bone Drybrush to the turquoise parts, barely any on the brush, take your time.
5.) (background switch was due to the grey not showing hawk turquoise well)
Metallics! 1:1 Chaos Black:Chainmail over all of the black bits, I did this in three thin layers. Vallejo 'Red Gold' over the brown. This only needed 2 layers. This paint is alcohol based so you'll need to avoid water in the painting process; I just put some gin in my pallet and used that to clean my brush every so often.

6.) Metallic highlights: drybrushed in the same was as the hawk turquoise, I held a piece of card in place or 'blocked' the brush from getting to any of the turquoise parts with a finger whilst drybrushing to preserve the blue. Chainmail + Mithril Silver was used on both the silver and gold parts.
7.) Washes! Again 1 drop vallejo glaze medium for every 5 of each wash is used to make sure they behave themselves

Gryphonne Sepia for the gold, Badab Black for the silver: this will mute the highlights done in the previous step to some degree. If it's too much for you, repeat the previous step, if not repeat this step, just ensure to leave time for everything to dry fully.

8.) Possibly the most important stage in my opinion here 'filling in' the recessed details, and gaps between panels. This makes everything around them look better, and just takes a bit of time (scroll up and check, the difference is huge!) I kept a cotton bud at hand to mop up any excess.
The mix for filling in the gaps was Devlan Mud + Badab Black, 2 stages in the fine lines and 3 or 4 in the gaps between panels.
9.) At this point I realised that I'd forgotten to give the pilots their golden shoulder pads, this was done in exactly the same was as the panels on the vehicle.

10.) The Barge is done apart from details which I leave till last, onto the gun! Basecoat in Chainmail:Boltgun:Chaos Black 2:1:2 (over black spray undercoat).
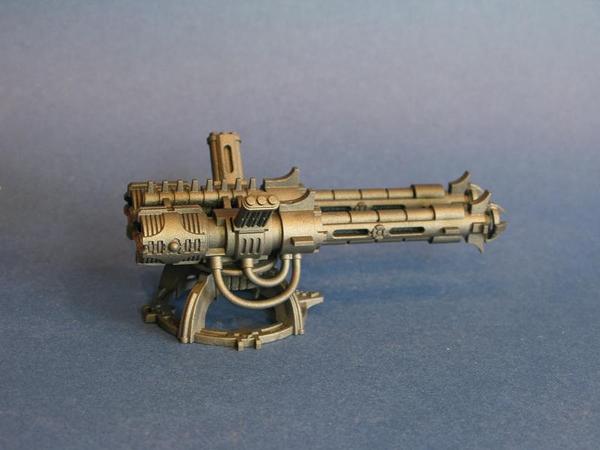
11.) Drybrush the gun with chainmail:mithril 2:1

12.) Very carefully paint the recesses black (or just remember not to basecoat them silver!). Undercoat the piping and recesses in the gun dheneb stone. Use as many coats on the piping as needed to get a consistent flat base.
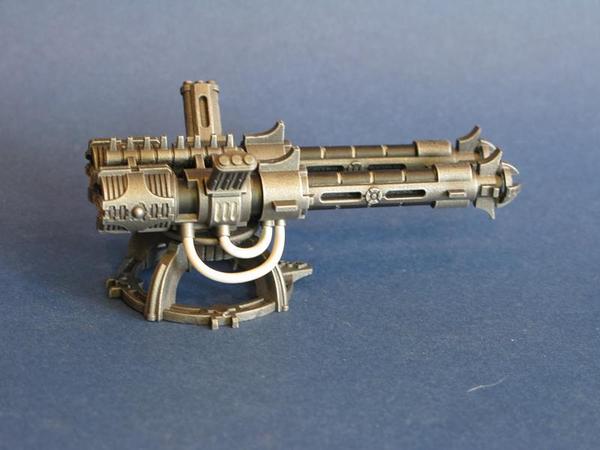
13.) (Airbrush) Mask off the area under the pipes, I hit the middle with scorpion green+sunburst yellow, I start bright and work down (along the pipes) in shade. The reason for this is that I want a luminous colour, and the effect is far easier over white, rather than starting dark green and working my way up through to light.

(Not pictured) I then sprayed the recessed very carefully with this mix. You want to limit 'overspray' but the small amount you will get 'accidentally' can be used to your advantage; a small amount will make the areas look like they are pulsing or glowing.
Remove the masking tape before the next stage, the 'highlight' colour was too bright to be around the tubes, the mid tone is not, and as above the overspray will add to the glowing effect.
14.) (Airbrush) Add dark angels green to the previous mix, and spray either side of your highlight, then add some more (roughly 3:1 DAG:Previous Mix) for the final shade.
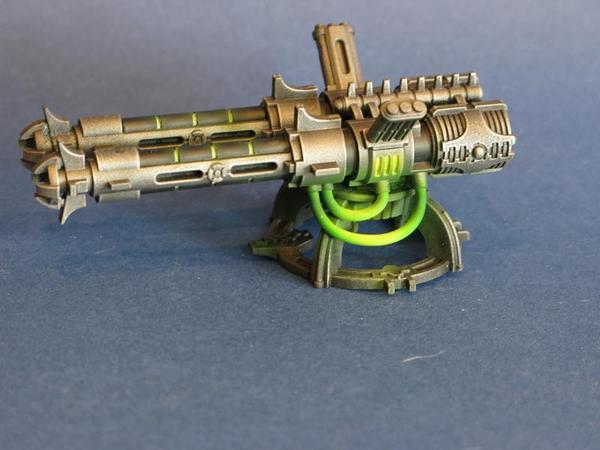
15.) The 'gems' are painted dark angels green, with a highlight of scorpion green and then dots of skull white:scorpion green 5:1 to make them look glassy, an alternative to this is just to paint them with gloss varnish.
Finished!
For maximum results, repeat on 3 or more vehicles


What our customers are saying...
Sign up for our newsletter - for the latest news and promotions
Element Games Team
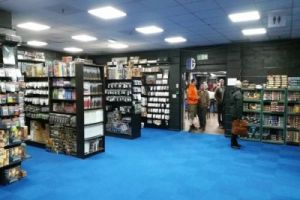
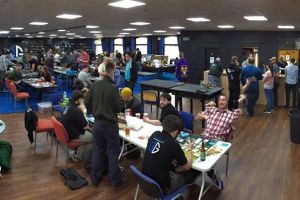
Stockport Store and Gaming Centre