How to Paint Plaguebearers - How to Dip Warhammer Miniatures
If you have any questions / comments, please feel free to post on the forum thread for this tutorial.
As normal I've rambled loads, so instead of spamming the top of the thread with it I've put it at the bottom, read that first if you don't mind my not getting to the point very fast, otherwise here's the tutorial!
How to Paint/Dip Plagebearers of Nurgle and Nurgle Gribblies
Equipment:
Plaguebearers of Nurgle
Necrotic Flesh Primer
Necrotic FleshPaint (for touch-ups)
Screaming Skull
Incubi Darkness
Biel-Tan Green
Quickshade Soft Tone
Testors Dullcote
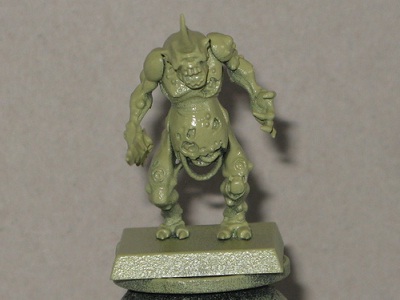
Build your mini, I tend to attach mine to temporary bases, a little dot of glue will do as you're going to cut/twist it off once it's done anyway.
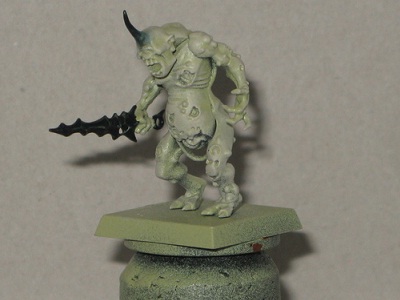
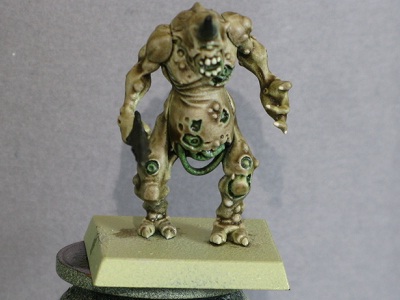
Meet Paul: he's getting a makeover.
Step 1: Undercoat: Black, more out of habit than anything else.
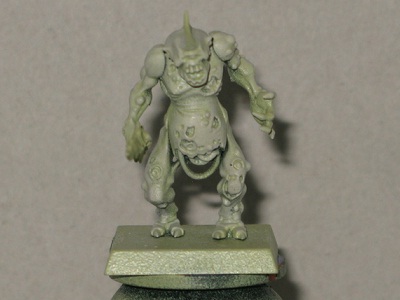
 Step 2:
 Army Painter Necrotic Flesh Primer - two careful coats, you can go all over with both, or all over with one, and just from above with another for preshading.
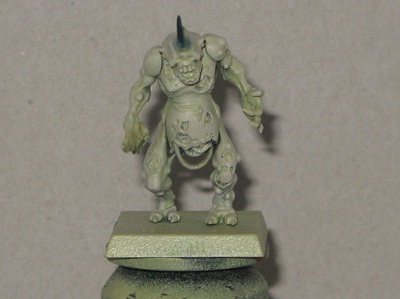
 Step 3:
 Screaming Skull Drybrush - all over (once primer is dry).
 Step 4:
 Incubi Darkness on the Horn, I did one coat, then a second at the base, which I feathered in with a wet brush to get a rough fade. (Prod at it with a slightly wet brush before paint has dried, go fast, works wonders).
 Step 5:
 Add Matt Black to Incubi Darkness 1:1, and undercoat the sword, don't worry if the edges don't coat - you just accidentally highlighted them

.
 Step 6:
 Biel-Tan Green wash - all of the disgusting bits.
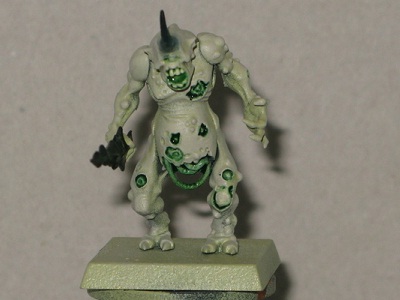 Step 7:
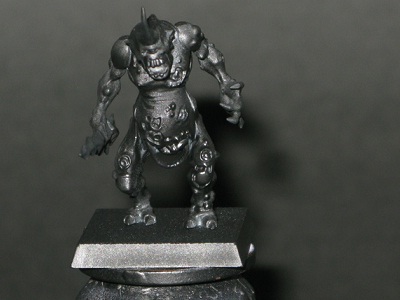
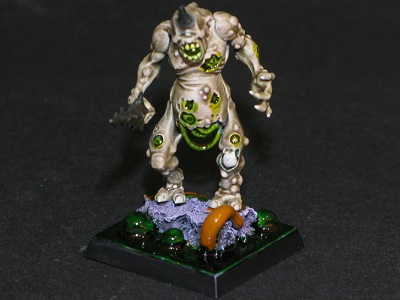
 DIP! Army Painter Soft Tone.
I gently swirl my Quickshade before using it, then leave it at a slight angle, this way drips run off the cap to avoid it getting messy.
Magic Tip of Doom:
Rather than scraping excess off your brush and mucking up your tin use an elastic band.
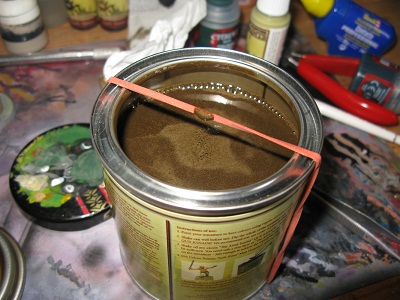
Brush on Dip (an old brush, this is not good for their life expectancy), bottom to top, soaking up any excess and using it on the next layer up. This will help avoid streaking down the model.
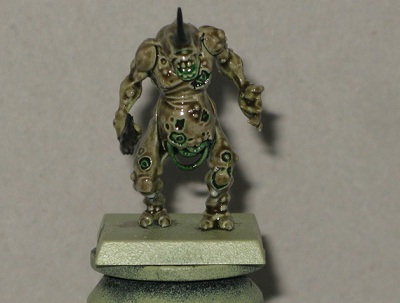 Step 8:
 Matt Varnish, all over, I use Testors Dullcote.
 Step 9:
 Details - Screaming Skull on teeth, fingernails, eye, and kneecap.
 Step 10:
 Slime! Tamiya Clear Yellow and Green used on the gribbly bits.
Done!
Pop him on a base of your choosing - the tutorial for this one will be available soon in
The Basing Bible thread.
Ramble/Dipping Spiel
'Dipping'
Dipping is the term I'm going to be using throughout this tutorial, however at no point will the model be dipped into the Quickshade. I'll be using a brush, because it's less messy, and I don't have a spare room covered completely in plastic sheeting. American Psycho informs us that anyone who does is probably a bit of a maniac anyway...
What is 'dipping'?
Dipping is a magical technique which encompasses a number of applications, but the basic defining aspect is an all over wash with an Army Painter Quickshade product.
How does dipping differ from normal painting?
In my eyes there's only two real differences, both of which concern your basecoat. Whatever you dip will end up darker than it started, so you have to start off with brighter colours than you would normally. Also, and very importantly your basecoat has to be flat and consistent, washes will show up any inadequately coated areas, and this is exactly the same!
Finally it's probably worth mentioning that I view the year or so I spent dipping anything I could lay my hands on as the single most influential factor on my painting style today. It is a technique that will produce fantastic (efficient!) results if you spend time doing the basics right. Some idiots out there view it as a lazy/crap technique, I've frequently heard to spoken about with derision. However they're probably the type of mentalists who turn their noses up at drybrushing... It is like anything else - done well it's fantastic, done wrong it will look like dog sick.
Done well a lot of times it will drive the basics in to your brain better than any opinionated tutorial would ^_^.
What it comes down to is
there are few better ways out there to produce a good looking army fast.
A couple of generic pointers:
1.) Undercoat your model brighter than you would normally, spray primers are ideal.
2.) Generally I wouldn't dip the base, it's good, but it can't do everything. Exceptions would be more uniform unnatural bases - cobbles, futuristic metal, etc.
3.) Your model will probably look crap until you have sprayed it with a matt varnish, Dullcote is king here.
4.) You can paint as much before/after dipping as you like, if you want something super bright do it after, if you want it homogenised/dulled down do it before.
5.) Fitting with the above point you can definitely get away with using white more than you would normally if you are going to dip over the top, especially with drybrushing!
6.) Most importantly (I will bang on about this a lot) your basecoat is the solid foundation which'll make this technique work, full, flat coverage is king.
What our customers are saying...
Sign up for our newsletter - for the latest news and promotions