Multi Stage Pre-Highlights + Hybrid Glazes
If you have any questions / comments, please feel free to post on the forum thread for this tutorial.
Multiple stage pre-highlighting, and 'thick'/hybrid glazes (not as complicated as it sounds!)
Hi chaps and chapesses, this is something that I've been meaning to do for a while now, the below tutorial covers something which I find very useful very frequently. I am a great fan of pre-highlighting (for an example of which see my
Daemonette,
plaguebearer, and
Annihilation Barge tutorials). In fact, you could look at all but about 2 of the tutorials I've got on the site so far � I am a massive fan of preshading/prehighlighting, and find that it is actually somewhat of a crutch as far as my painting goes.
[Waffle/theory warning, skip if you like!]
Pre-Highlighting in general, and extended pre-highlights
The basic intent of preshading/prehiglighting is to lay a (usually**) black and white foundation, upon which you then use non-opaque paints (transparent according to taste/desired effect), allowing the foundation to do a lot of the work as far as highlighting and shading goes.
There are many benefits to this technique, but primarily for me it comes down to (but is not limited to) a few in particular:
1.) Speed: Pure and simple
2.) Making a model less of a blank canvas: a mini looks far less intimidating when it isn't bare black.
3.) Richness of colour: you can use just one or two colours to achieve all but the most extreme highlighting with this technique, allowing texture to do a lot of the work. If you have a particular favourite you can use it exclusively, without having to mix it with other inferior paints!
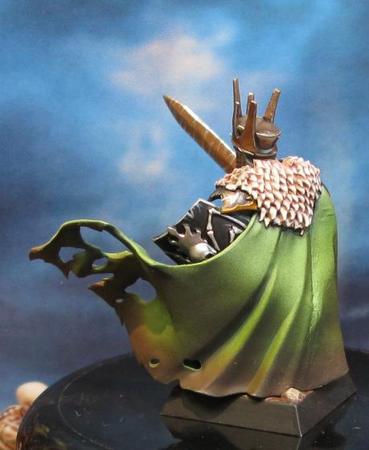
I used Dark Angels green and Snakebite leather on this cloak, and let the texture and preshading dictate the tones:
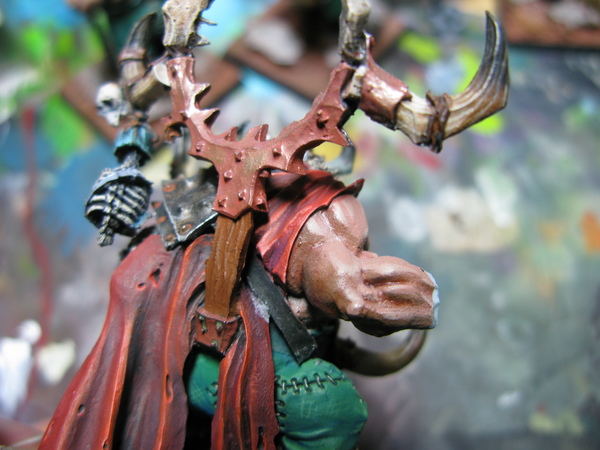
4.) Flexibility: As with every technique this has a time and a place, it is perfect for certain textures. I used it on this potentially super fiddly section of the horrendous Golgfag Maneater cloak, which my normal top down pre-highlighting wouldn't work for. Unfortunately his trophy rack covers the top section where it was put to best use but hopefully the pictures are enough to see adequately.

A lot of the above are benefits of the normal pre-highlighting and preshades that I use, but with a simple light drybrush of white over a model after them you can take things further with this if appropriate. The bases below used a drybrush and then a super-quck edge highlight.
As with most pre-highlighting techniques there is no need to worry about being paticularly neat with this, all but the biggest istakes will be hidden in the stages that follow after.
Glazes (Hybrid semi-opaque glazes?)
I have no decent idea of a name for these that doesn't sound awfully pretentious, basically I'm talking about glazes with other stuff added in.
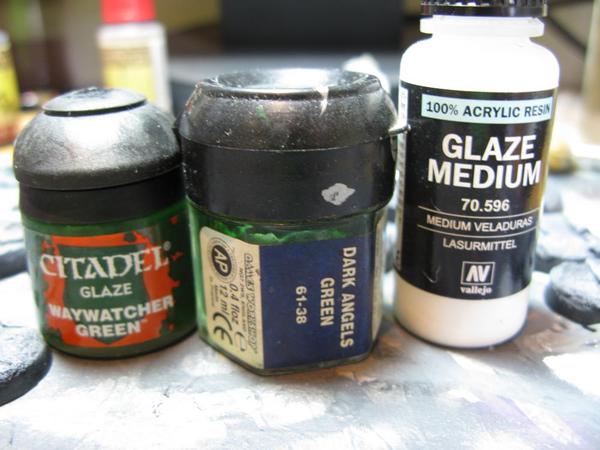
The glaze used in the below tutorial is a mix of one of my favourite old GW colours � Dark Angels Green, which is a beautiful deep colour, but always covered awfully. This doesn't matter at all, as in this tutorial we're using it to tint an area as a whole. To thin this out I've added Waywatcher Green glaze, and to avoid streaks and make it behave itself in general I've added my beloved Vallejo Glaze Medium.
If there's a GW (or other manufacturer, although I've not used them) pre-made glaze to use go for it, otherwise a GW (or other, again) wash works o.k, add a small amount of paint, ideally a little glaze medium, and mix thoroughly.
As with everything hobby-wise experimentation is king, adapt, customise, butcher the above recipe, make it work for whatever you're painting.
END OF THEORY/WAFFLE, let's get on with it
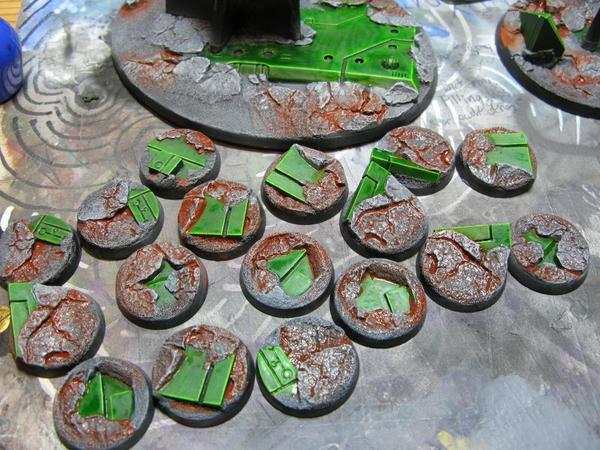
I've chosen something fairly simple to demonstrate this technique on for the tutorial, my main reason for using this technique here was that I wanted a black-light grey colour on the bases as the main colour. This was convenient as the stages normally involved in this (gratuitous drybrushing) are part of the pre-highlighting process anyway, so effectively added no time.
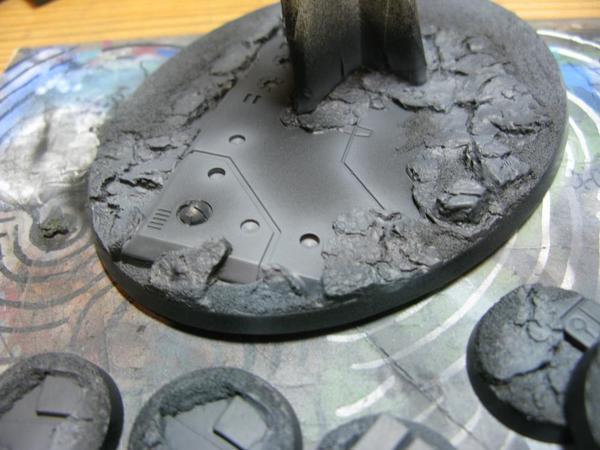
Step 1 - Undercoat
I was using resin bases for these, which were from a commission job, please note **IF YOU ARE DOING FLYING STANDS DO NOT GLUE THE TRANSPARENT BITS ON FIRST, IT CAUSES NO END OF FAFF!**, I spend ages masking them off, as I wanted to spray undercoat them.
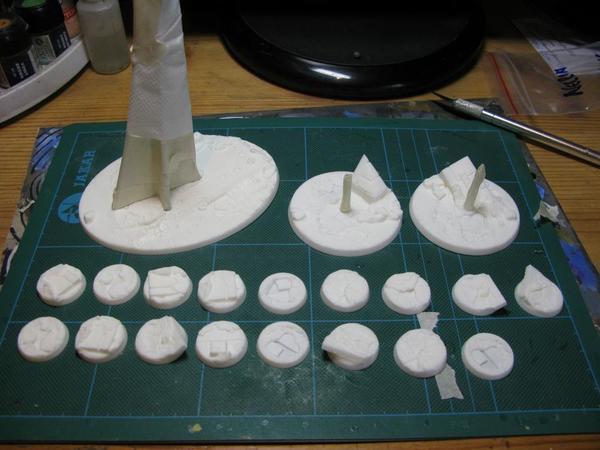
If your resin bases are white/very light like the ones I'm using take extra care to get in those cracks, after the spray undercoat you may need to go in there manually with watered down black to catch any bits which have been missed.
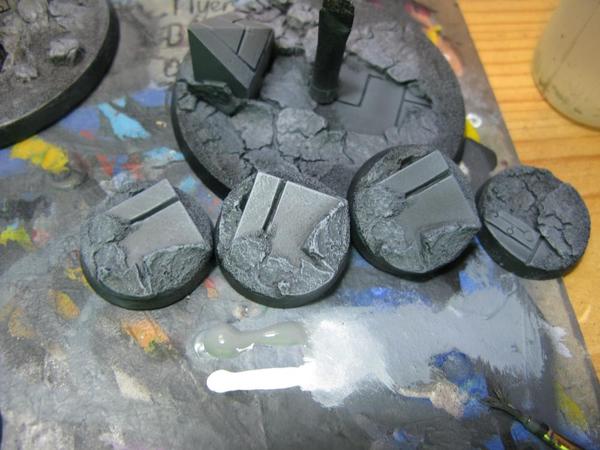
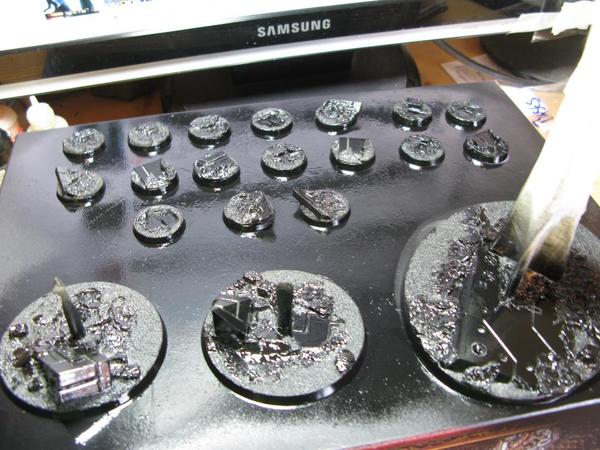 Step 2 (optional)- First Pre-Highlight
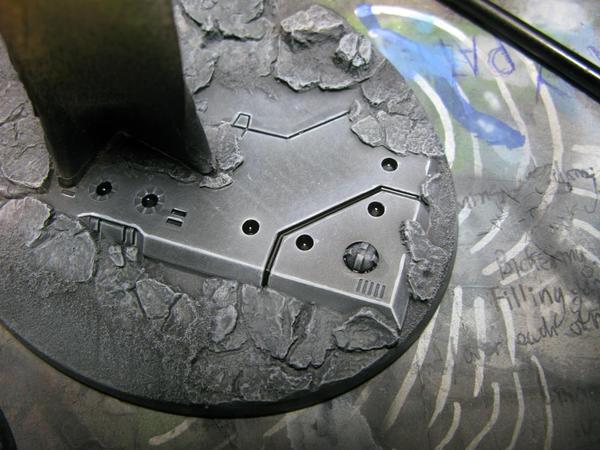
Using a light grey I airbrushed the panels of the 'panelled' sections of the bases, if you don't have an airbrush a careful light drybrush or stipple with a small brush will do fine. This step won't always be the same, normally on a larger model, especially one shaped 'organically' like a monster a spray with a light grey from a spray can would be fine, if you don't have grey a super-light 'dusting' with white works o.k. Go as heavy as you light with the spray pre-shading, the degree of highlighting will show though in the final result.
 Step 3 � Drybrushing
 Get the largest possible brush you can use for the job and go to it, light drybrushes in careful repeated stages are a good way to go until you get used to the amount you need on your brush. I mixed white and grey as seen in the picture.
Two lines of paint next to each other on my pallet is the normal way I do drybrushing, dragging them together as I see fit, this is a very fast way to do things, and is much easier if your paints are in dropper-bottles. If not two blobs works fine.
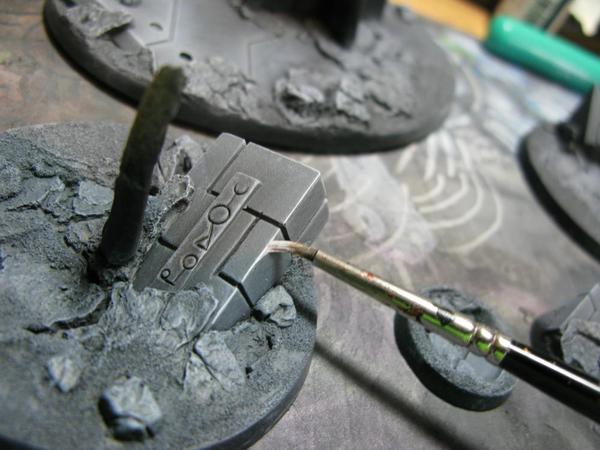
Step 4: Extreme (brush) pre-highlight
Normally this would be a drybrush, but in this example I'm using something that I wanted edge-highlighting. If doing a 'manual' highlight as opposed to a drybrush one try and pick the areas you'd normally highlight with your final or penultimate highlight with normal painting.
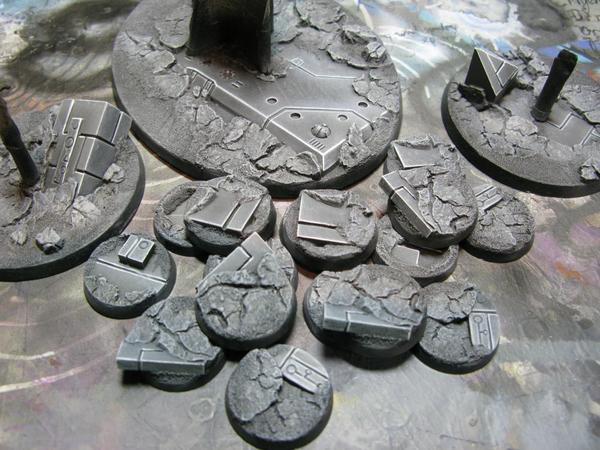
And en masse for your viewing pleasure; I want to do a stylised army in involving this black and white cartoony look as some stage when I can work out how on earth that would be done without looking crap.
 Step 5: Extreme Shadows ('detail dotting')
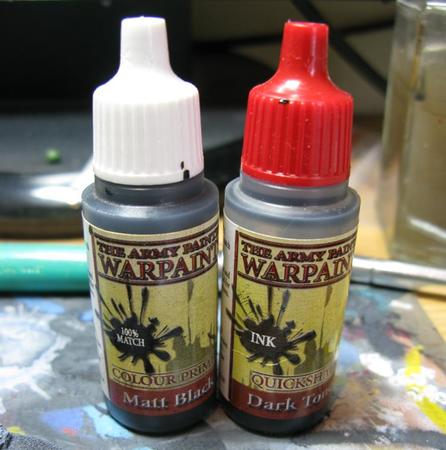
On some occasions what you are painting may have details you want to be black, or all but black, for this I mix black wash and black paint. The wash makes it more fluid, without being watery, and also slows drying times, which means you can wipe up any mistakes, bonus!
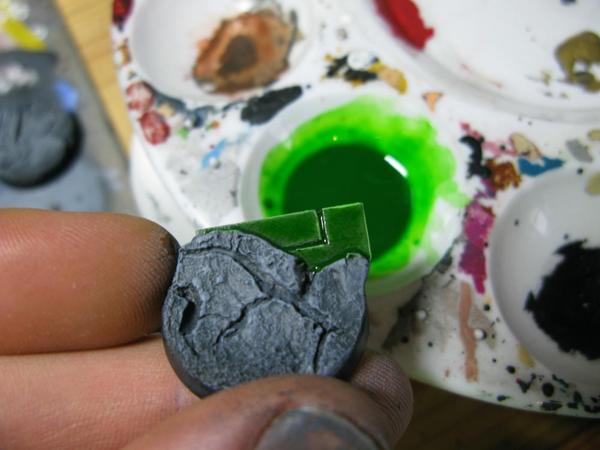
 Step 6: Glaze time!
 (Glaze-Theory included above)
Waywatcher Green Glaze, Dark Angels Green, Valleo Glaze Medium � roughly 10:2:1
 Done
Done in this case I added my normal pigments and tufts (see
http://www.elementgames.co.uk/forums/speed-basing-armies-painting-efficient-high-quality-bases-t235.html
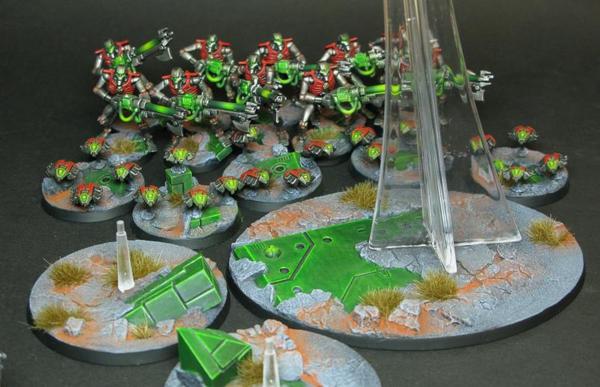
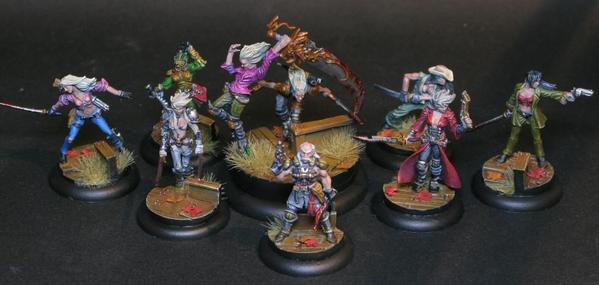
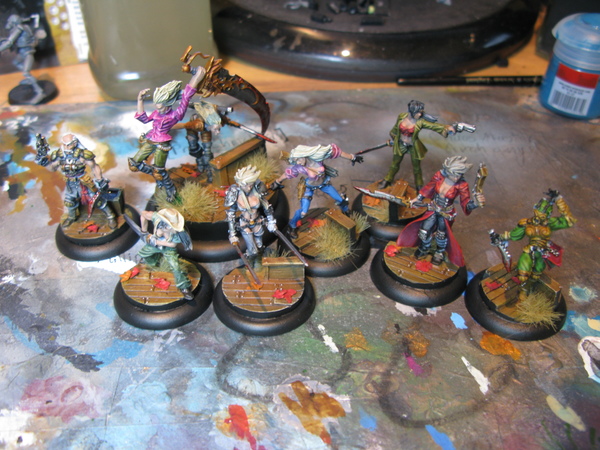
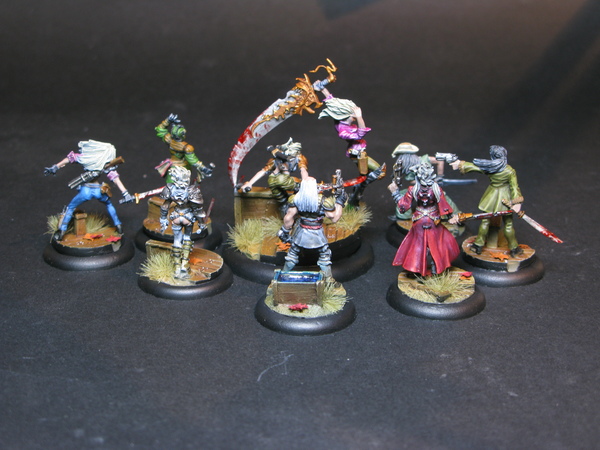
You can paint or do whatever you like around your pre-shading, entire models can be done with this technique, such as the malifaux crew I painted a while ago:
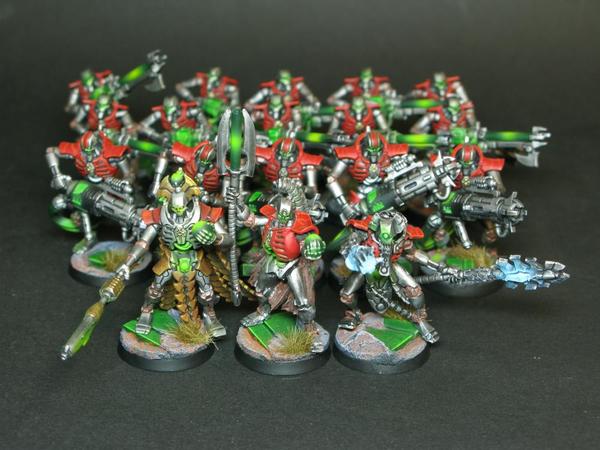
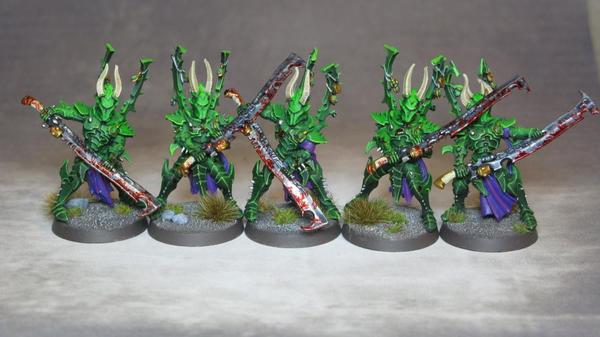
The hybrid glaze technique can also be applied to models as a whole, without the line-prehighlights, just over normal preshading. The Dark Eldar Incubi below were given 2 stages of pre-highlights, grey from 35 degrees, and white from 10 degrees+on top, and then got an all over glaze for their armour. This was the main section of the model, the rest of the details were painted traditionally with opaque paints and highlights, and once dry the armour was given an edge highlight of the colours from the glaze + yellow and white.

**You can use pre-highlighting and preshades of whatever colour you like to achieve a myriad of results and effects, James Griffiths, of
Infamy Miniatures and general
beautiful miniatures fame who paints beautiful minis uses them to great effect.
I hope this is of some use to someone, it's the type of thing which sounds far more tricky than it is, I find it saves time rather than costs it! As ever, all feedback/questions welcome here or on
The Element Games Twitter
Cheers,
Byron
What our customers are saying...
Sign up for our newsletter - for the latest news and promotions